Administering a Computer-based Test Session
This section contains information on how to start a test session, add tests to the session, verify a student’s test settings, approve a student for testing, and monitor the student’s progress.
Computer-based Assessments:
- Green—Smarter Balanced Interim Assessments
- Red—Smarter Balanced Summative Assessments
- Indigo—California Alternate Assessments (CAA)
- Brown—California Science Test (CAST)
- Mint—California Spanish Assessment (CSA)
- Teal—Initial ELPAC
- Blue—Summative ELPAC
- Orange—Alternate ELPAC
- Purple–Initial Alternate ELPAC
Online Practice and Training Tests:
- Pink—All practice tests
- Golden Yellow—All training tests
A test session must be created before the TE can log the student on to the secure student browser. For a student to take a specific test, the test must be selected in the test session.
Entering Student Responses into the System
A student or the TE may enter responses into the testing device using a mouse, keyboard, or other assistive technology as necessary. The DFAs and training materials include guidance on the use of engagement strategies, including the “Mark as No Response” functionality and the use of pauses and breaks, so that TEs can identify when it is appropriate to continue administering the test or when it is appropriate to stop testing and submit the test.
LEAs can refer to the Response Options for Alternate Assessments flyer for more information on what to do during the assessment based on the student’s needs, skills, and abilities. Decisions on how to administer a test to each student should be informed by the TE’s knowledge of the individual student.
Using the Mark as No Response Feature
TEs should follow guidance in the DFAs and training on the use of engagement strategies, including the use of the “Mark as No Response” option. For cases where the student is presented with a question and does not respond, after attempts to reengage the student have been made either the same day or during another session, TEs should use the “Mark as No Response” option. On each test question within the student interface, TEs have the ability to select “Mark as No Response” in the context menu. Questions that have been marked as no response can be presented to the student again as appropriate. If the TE determines that the student’s test should be stopped and submitted, the TE should be sure that at least one receptive and one expressive test question have been responded to or have the “Mark as No Response” option selected in the context menu to count the student as having participated in the assessment. Questions that have been marked as no response will have this symbol of a circle with a diagonal line through it:  .
.
Note that to be considered as having participated in the Summative Alternate ELPAC, a response must be indicated using the MC options or the “Mark as No Response” option in the context menu for, at minimum, one receptive test question and one expressive test question. If a student’s test is submitted without a response for at least one expressive test question and one receptive test question, then the student will not be counted as having participated. In the administration scripts in the DFAs, receptive test questions are marked with an “R” [ ] icon, and expressive test questions with an “E” [
 ] icon. LEAs can refer to the Alternate ELPAC Participation and Scoring flyer for more information.
Figure 1 shows how to select the “Mark as No Response” option in the TDS. A warning will appear. More information on the “Mark as No Response” feature is available in the DFA.
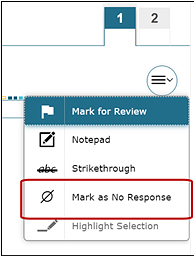
Figure 1. “Mark as No Response” option
Figure 2 shows the warning that appears when the “Mark as No Response” feature is used.

Figure 2. “Mark as No Response” warning message box
Pause Rules
The pause rules that follow apply regardless of whether the student or the TE pauses the test, or whether there was a technical issue (for example, power outage or network failure) that resulted in the student being logged off. The same pause rules used on the CAAs apply to the Summative Alternate ELPAC. For example, the TE may pause and resume the test as many times as necessary to allow the student to perform well, even if this means that a test will be administered over a number of days. However, once the testing window has closed, all open tests will be force-submitted, and students will not be able to continue testing. LEAs can refer to the Response Options for Alternate Assessments flyer for more information on when to pause and resume testing during the assessment. flyer for more information on when to pause and resume testing during the assessment.
Test Timeout (Due to Inactivity)
As a security measure, the student and TE are automatically logged off after 30 minutes of test inactivity. For the student, activity is defined as selecting an answer or navigation option in the assessment (for example, selecting [Next] or [Back] or using the Questions drop-down list to navigate to another item). Moving the mouse or selecting an empty space on the screen is not considered activity. This timeout also results in the test being paused automatically.
For the TE, activity means that the student is registering test activity. As long as the student is testing, the TE will not be logged off. If the student is not engaging with the items, the TE can pause and resume the test as many times as necessary, including over multiple days. Be sure to keep in mind that the test will expire at the end of the testing window. Before the secure browser logs the student off the test, a warning message will be displayed on the screen. If [OK] is not selected within 60 seconds after this message appears, the student will be logged off. Selecting [OK] will restart the 30-minute inactivity timer.
Figure 3 provides an example of the message that appears in a test timeout warning:
![Test timeout warning message that reads, 'Are you still there? Click OK to continue or you will be logged out in 30 seconds. [Message Code: 10906]'](/s/alt-elpac-tam/administering-to-students/administering-online-test-session/2023-clip_image009.jpg)
Figure 3. Test timeout warning message
Test Expiration Rules
“Opportunities” refers to the number of times a student can take a test within a range of dates. The test remains active until the student completes and submits the test or until the test expires, whichever occurs sooner. The test will expire once the testing window has closed. Once a test opportunity expires, the student cannot complete or review the test unless a Reopen Appeal is submitted through STAIRS. Specifically for the Summative Alternate ELPAC, once a test expires, a student cannot complete or review the test because the end of the testing window has been reached.
Estimated Testing Times
The Summative Alternate ELPAC is an untimed test. Each task type is presented in each grade level or grade span. The estimated cumulative testing time for the Summative Alternate ELPAC is 60 to 90 minutes. This estimated testing time includes the presentation of student directions, stories, and test questions. The estimated testing time does not include logon and device setup time.
The estimated time for the administration of each task type is provided in table 1.
| Task Type | Kindergarten–Grade 2 | Grades 3–12 |
|---|---|---|
| Recognize and Use Common Words | About 9 minutes | About 7 minutes |
| Communicate About Familiar Topics | About 4 minutes | About 3 minutes |
| Understand a School Exchange | About 7 minutes | About 5 minutes |
| Describe a Routine | About 7 minutes | About 5 minutes |
| Understand and Express an Opinion | About 8 minutes | About 7 minutes |
| Interact with a Literary Text | About 6 minutes | About 6 minutes |
| Interact with an Informational Text | About 6 minutes | About 6 minutes |
| Field test sets (two sets) | About 13 minutes | About 11 minutes |
| Total | 60 minutes | 50 minutes |
Beginning the Test
Follow these instructions to administer the Summative Alternate ELPAC. The TE must create a test session before logging the student on to the student device via the secure browser (but no more than 30 minutes prior or the system will time out). When a TE creates a test session, a unique session ID is randomly generated. This session ID must be inserted into the student device and should be written down. A PDF of these logon instructions is also provided on the Manuals and Instructions web page on the ELPAC website.
The TE also has the option to schedule a test session for a future test date in the Test Administrator Interface. The TE would select the [Upcoming Sessions] tab and then select the [Schedule a Session] button to select dates for the test session using the calendar tool. After selecting the future dates, the TE would select the tests to add to this session and then select the [Save Session] button. The future session would then show in the Upcoming Sessions table.
The basic workflow for administering computer-based tests is as follows:
- The TE selects the tests and starts a test session in the Test Administrator Interface.
- The TE or student signs in for the test in the secure browser.
- The TE reviews and approves the student’s requests for testing. The TE should verify whether all the accessibility resources are appropriately assigned to the student at this time.
- The TE administers the test one-on-one with the student and uses the guidelines in the student’s IEP. Once the testing has been completed, the TE submits the student’s test.
- The TE stops the test session and logs off.
The TE completes the following steps to begin the assessment:
- Navigate to the ELPAC website on a supported web browser.
-
Select the [Test Administrator Interface for All Online Tests] button on the left side of the screen, as shown in figure 4.
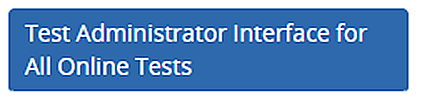
Figure 4. [Test Administrator Interface for All Online Tests] button
- For training test administration, select the [Practice & Training Tests] button.
-
Log on to the Test Administrator Interface using the TE’s TOMS sign-in credentials, as shown in figure 5.
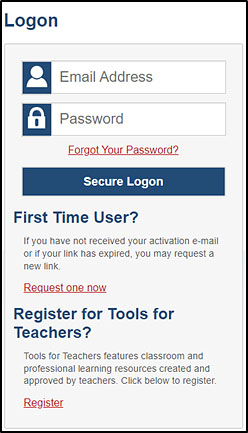
Figure 5. Test Administrator Interface Logon screen
-
If the TE is associated with multiple schools, an Important! message appears when the TE logs on. The TE must select the appropriate school from the Select your School/District drop-down list in this message and select the [Go] button, as shown in figure 6. The TE may only select one school or district at a time. The TE will only be able to administer tests available for the selected school or district. To select a different school or district, the TE must log off and then log back on.
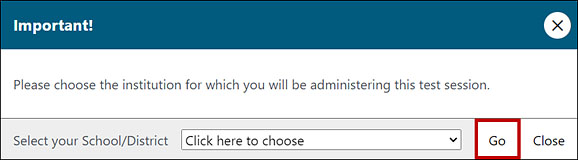
Figure 6. Important! message from the Test Administrator Interface
-
Once logged on to the Test Administrator Interface, the [Active Sessions] tab will appear. Select the [Join] button (figure 7) to join a previously scheduled session, or select the [Start a New Session Now] button (figure 8) to start a new session.

Figure 7. [Join] button in the Test Administrator Interface

Figure 8. [Start a New Session Now] button in the Test Administrator Interface
-
The Operational Test Selection screen, as shown in figure 9, color-codes tests and groups them into various categories. A test group may include one or more subgroups. All test groups and subgroups appear collapsed by default. Select the [Summative Alternate English Language Proficiency Assessments (ELPAC)] test group to begin.
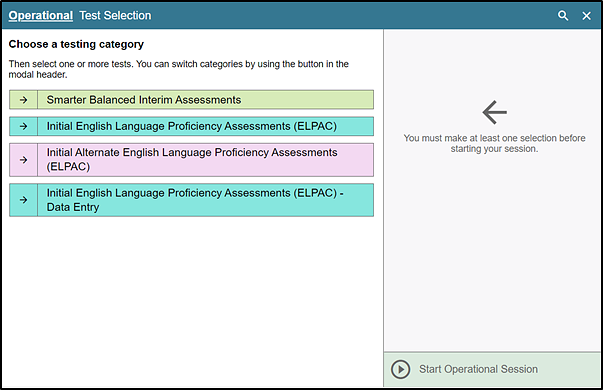
Figure 9. Operational Test Selection screen
-
To select tests for the session, mark the checkbox for the test that is to be included, as shown in figure 10.
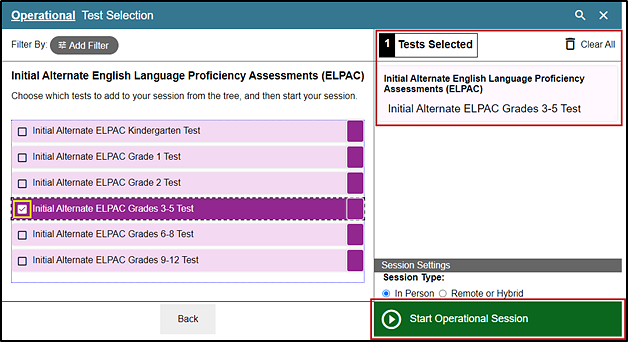
Figure 10. Expanded Operational Test Selection screen
-
Select [OK] in the Important! confirmation box that opens (figure 11).
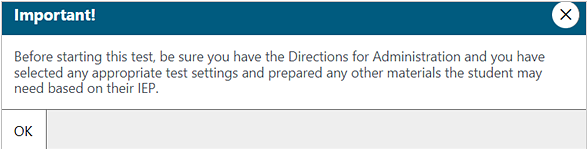
Figure 11. Important! confirmation box
- Either use the filtering feature to open specific grade level, grade span, or content-area assessments; or, to start the test, select the [Start Operational Session] button. These features are shown in figure 12.
- Select the [Add Filter] button [
 ] to access the filter panel.
 -
Expand the available filter categories by selecting a [Plus] plus-sign [
 ] icon (as shown in figure 12).
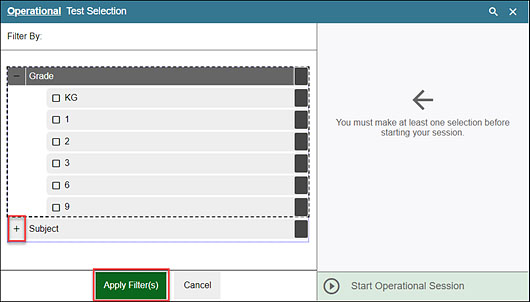
Figure 12. Sample Operational Test Selection screen with filtering option
- Check the criteria to filter.
- Select the [Apply Filter(s)] button [
 ] (indicated in figure 12).
 -
Remove the filter by selecting the [Remove Filter] “X” icon [
 ] (indicated in figure 13, which also presents the screen that displays after the [Apply Filter(s)] button was selected).
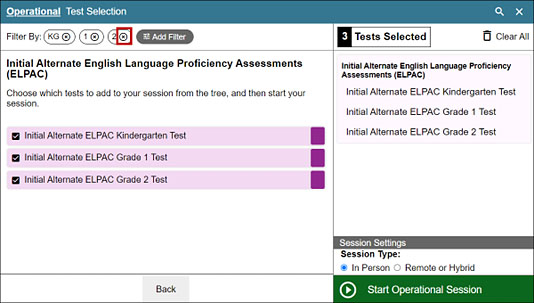
Figure 13. Sample Operational Test Selection screen with filtering applied
-
Select the [Start Operational Session] button, as shown in figure 14.
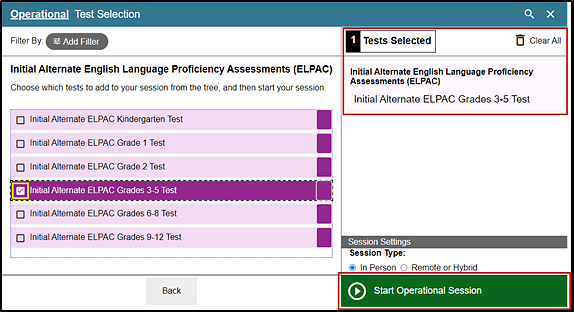
Figure 14. Operational Test Selection screen
- Select the [Add Filter] button [
-
The session ID is automatically generated upon selecting the [Start Operational Session] button in the previous step. Write the session ID, as shown in figure 15, and provide the written session ID directly to the student for one-on-one administration, or enter the session ID directly into the secure browser to help the student log on.

Figure 15. Top of the Test Administrator Interface
-
Instruct the student to open the secure browser, if it is not open already, and log on using the Student Sign In web form. For a student who may require assistance, perform the sign-in steps.
-
Student
Sign in using the Student Sign In web form, as shown in figure 16. The student or the TE (if the student needs assistance) will enter the first name and the SSID of the student as it appears in CALPADS. The test session ID must be entered as it appears on the Test Administrator Interface.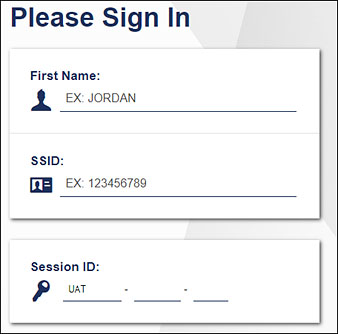
Figure 16. Student Sign In web form
-
Test Examiner
Ensure that all information has been successfully entered into the system. -
Student
Verify identity by selecting [Yes] or [No], as shown in figure 17.
Figure 17. Is This You? screen
-
Student
Select the test to take, as shown in figure 18.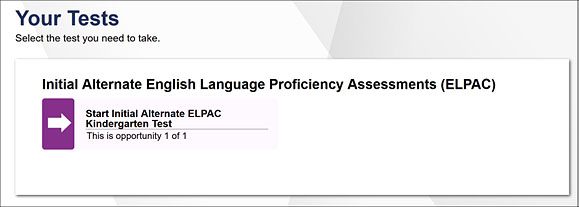
Figure 18. Your Tests selection box
-
Student
TE approves the student to be tested, as shown in figure 19.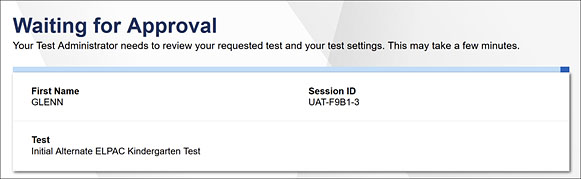
Figure 19. Waiting for Approval dialog box
Steps 18 through 20 are completed on the TE device.
-
Test Examiner
Approve the student for testing by opening the [Approvals] tab and then selecting the [Approve] check mark [ ] icon in the Action column for the individual student, as shown in figure 20.
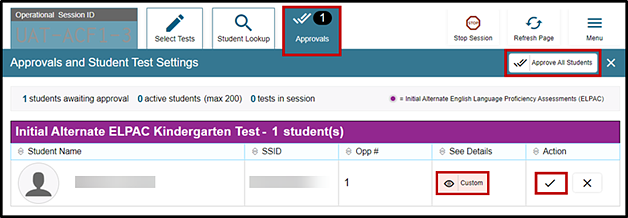
Figure 20. Approvals and Student Test Settings screen
-
Test Examiner
Select the [View] eye [ ] icon, as indicated in figure 20, to view and correct the student’s test settings for the current test opportunity. “Custom” in the See Details column indicates the student has been assigned test settings. Refer to the Accessibility Resources subsection of this manual for the embedded resources that are available for the Summative Alternate ELPAC.
- To confirm the settings, select [Set] at the top of the student’s Test Settings screen (figure 21). The TE must still approve the student for testing.
- To confirm the settings and approve the student, select the [Set & Approve] button (figure 21).
-
To return to the Approvals and Student Test Settings screen without confirming settings, select [Cancel] (figure 21).
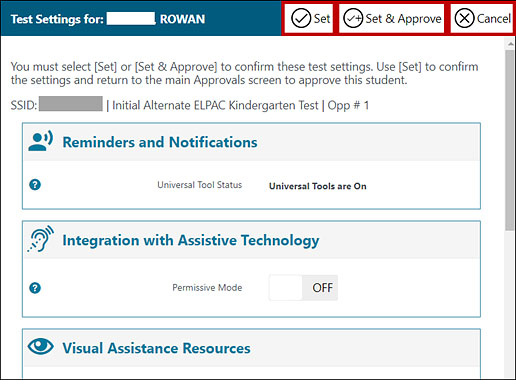
Figure 21. Part of the Test Settings screen for a selected student
-
Test Examiner
If the settings are incorrect, the TE should select [Cancel]. The TE must report the incorrect test settings to the site ELPAC coordinator, who will update them as required in TOMS and reschedule the student’s testing. The update, once made, may take up to two to four hours to appear in the Test Administrator Interface. After a student’s test settings are corrected, the test can be administered to the student as previously described. -
Student
The Instructions and Help screen is the last step of the sign-in process (figure 22).
Figure 22. Instructions and Help screen
-
Student
The TE may use the Review Test Settings screen to review settings that were approved for the student to use during the test (figure 23). The TE may use the Help Guide to understand how to navigate the test and use test tools.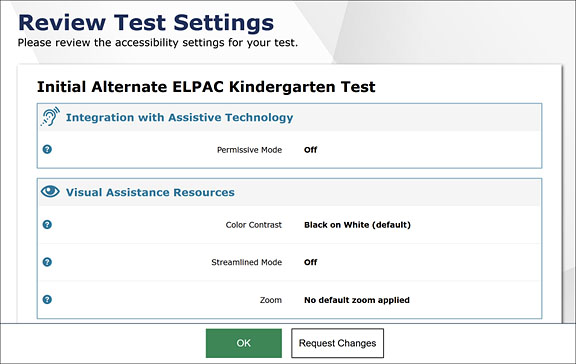
Figure 23. Review Test Settings screen
-
Student
Select [Begin Test Now] (indicated in figure 24) to begin testing.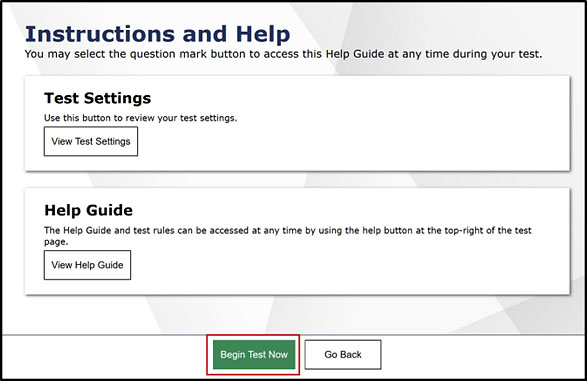
Figure 24. Instructions and Help screen
-
Student
A message will appear prior to administering the test to the student verifying the correct DFA, and picture cards, if appropriate, are available before testing (figure 25).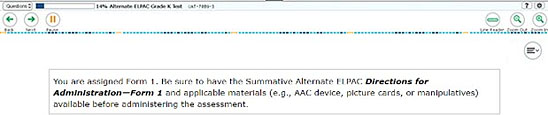
Figure 25. Confirm testing materials message
-
Test Examiner
Follow the scripts in the DFA as the administration gets underway. While administering the Alternate ELPAC, TEs are encouraged to provide the student pauses and breaks (including pausing and returning to the test on another day) to give the student the opportunity to demonstrate as much of the student’s language proficiency as possible without overburdening the student by presenting the student with questions that the student is not able to meaningfully respond to. These pauses and breaks are not considered stopping the test and should be done prior to submitting the test. Monitor the student during the test administration to decide when it is appropriate to stop and submit the test. Refer to the Student Engagement subtopic as well as the DFA for guidance on the administration of the Summative Alternate ELPAC.
Test Administration In-Test Survey Questions
In addition to administering and scoring test questions, TEs are also asked to complete a brief in-test survey regarding the student’s communication in the classroom as well as communication and accessibility during testing.
- All in-test survey questions are meant only for the TE and are part of the student’s computer-based test. They should not be presented to the student.
- There are six in-test survey questions that are presented at the beginning of the test, which must be completed by the TE prior to administering the test to the student.
- The remaining four in-test survey questions are presented at the end of the test. These four in-test survey questions must be responded to after the student has completed testing, but prior to submitting the test. (Refer to Ending a Test Session for the steps to end a test.)
The purpose of the in-test survey is to gather validity evidence on the following aspects of the Summative Alternate ELPAC:
- ELP:
- To gather an external measure of student ELP
- To provide a concurrent check on the validity of the test
- Communication modes:
- To gather evidence on the appropriateness of the assessment design (i.e., the organization of task types into receptive and expressive), which helps the CDE make the argument that evidence is being gathered about both students who are nonverbal (for whom the test gathers most information from receptive tasks) as well as students who are verbal
- Accessibility:
- To gather evidence about how accessibility resources are being used (e.g., will allow comparisons of those using a certain accessibility resource to those not using it, and the impact on test scores)
- To inform future test administration training (e.g., to fine-tune what needs to be emphasized in training)
In-Test Survey Part A (Segment 1: Questions 1–6)
[Single Selection Multiple Choice]
Based on interactions with this student during classroom instruction, which of the following best characterizes this student’s current level of overall ELP?- High or fluent English proficient (Students at this level have sufficient ELP. They may need occasional linguistic support to enable them to access adapted grade-level content in English.)
- Medium or intermediate English learner (Students at this level have moderate ELP. They may need frequent linguistic support to enable them to access adapted grade-level content in English.)
- Low or novice English learner (Students at this level have minimal ELP. They need substantial linguistic support to enable them to access adapted grade-level content in English.)
[Single Selection Multiple Choice]
Which of the following best describes the student’s listening skills in English?- Follows 2-step directions
- Follows 1-step directions
- Attends and responds to simple commands
- Indicates a choice when offered an array of items
- Points to or touches objects upon request
- Does not yet attend to sound
[Single Selection Multiple Choice]
Which of the following best describes the student’s speaking skills in English?- Verbally speaks 3 or more words in complete sentences using grammatical rules
- Verbally speaks 2 to 3 or more words in sentences or phrases without consistently following grammatical rules
- Verbally speaks 1- to 2-word phrases
- Verbally speaks 1 word at a time
- Uses touch and gestures by pointing and head nodding
- Uses a sign language (ASL or other)
- Uses vocalizations, gestures, and facial expressions to communicate intentionally
- Uses eye gaze with intentionality
- Uses an AAC system (e.g., communication board, picture cards, Big Mack Switch, Proloquo2Go app on iPad)
- Intentionally communicative, when interpreted by a familiar individual
- Not yet intentionally communicative
[Multiple Selection Multiple Choice]
Which of the following best describes the student’s reading skills in English?- Reads text without any symbol support with comprehension
- Reads text without symbol support but without comprehension
- Identifies individual words without picture support
- Reads words, phrases, or sentences when pictures or symbols are provided for support
- Recognizes letter sounds (knows sounds associated with letters)
- Recognizes letters (can identify them by name)
- Matches objects to pictures
- Identifies and names objects
- Does not yet have an understanding of print or text
[Single Selection Multiple Choice]
Which of the following best describes the student’s writing skills in English?- Writes 1 to 3 sentences (spelling not always correct)
- Writes a simple sentence or phrase (spelling not always correct)
- Writes words (spelling not always correct)
- Writes using word banks
- Selects letters or symbols to express meaning
- Copies letters and words, but does not produce independent writing
- Randomly selects letters or symbols when asked to write
- Makes random marks or scribbles
- Does not yet demonstrate expressive writing skills
[Single Selection Multiple Choice]
During classroom instruction, what is the primary communication mode that the student uses to communicate, either in English or in another language?- Verbal (i.e., spoken language)—responses of three words or more
- Verbal (i.e., spoken language)—two-word responses or fixed phrases
- Verbal (i.e., spoken language)—single-word responses
- Writing
- Gesture (e.g., pointing, nodding, touching, arranging)
- AAC systems (e.g., communication board, picture cards, Big Mack Switch, Proloquo2Go app on iPad)
- Eye gaze
- Braille (either contracted or uncontracted)
- ASL or other signed response
- Vocalizations (i.e., sounds made orally but not recognizable as words)
- Other
- Student does not yet have an established communication mode and does not yet demonstrate communicative intent
- Not sure what communication modes the student uses in the classroom
In-Test Survey Part B (Segment 3: Questions 1–4)
[Single Selection Multiple Choice]
During the Alternate ELPAC administration, what was the primary communication mode that the student used to respond to test questions?- Verbal (i.e., spoken language)—responses of three words or more
- Verbal (i.e., spoken language)—two-word responses or fixed phrases
- Verbal (i.e., spoken language)—single-word responses
- Writing
- Gesture (e.g., pointing, nodding, touching, arranging)
- AAC systems (e.g., picture cards, Big Mack Switch, Proloquo2Go app on iPad)
- Eye gaze
- Braille (either contracted or uncontracted)
- ASL or other signed response
- Vocalizations (i.e., sounds made orally but not recognizable as words)
- Other
- Student does not yet have an established communication mode and does not yet demonstrate communicative intent
[Single Selection Multiple Choice]
Did the student use any additional universal tools, other than expanding the items and passages as recommended for all students, during the Alternate ELPAC administration? (That is, did the student use other tools such as zoom, the highlighter, the digital notepad, etc.?)- Yes
- No
[Multiple Selection Multiple Choice]
Which of the following designated supports, if any, did the student use during the Alternate ELPAC administration? (Please choose as many as are applicable.).- ASL/MCE for test directions
- Color contrast
- Color overlay
- Designated Interface Assistant
- Magnification
- Masking
- Medical supports
- Mouse pointer
- Noise buffer
- Permissive mode
- Print-on-demand
- Print size
- Separate setting
- Simplified test directions
- Streamline
- Translated test directions
- Turn off any universal tool(s)
- No designated supports used
Note that if the last option is selected, make sure that the other options are not selected.
[Multiple Selection Multiple Choice]
Which of the following accommodations, if any, did the student use during the Alternate ELPAC administration? (Please choose as many as are applicable.)- Additional instructional supports and resources for alternate assessments
- Alternate response options
- ASL/MCE for content and responses
- Breaks
- Scribe
- Speech-to-text
- No accommodations used
Note that if the last option is selected, make sure that the other options are not selected.
Test Segments
The Summative Alternate ELPAC has only three segments. Table 2 contains the details of each test segment.
| Test Segment | Participant(s) | Content | Instructions |
|---|---|---|---|
|
Segment 1: In-Test Survey Part A |
TE | In-test survey questions 1–6 | Must be answered by the TE before administering the test to the student |
|
Segment 2: One-on-One Test Administration |
TE and student | Test questions 1–30 | Must be administered one-on-one with TE and student (After the test segment is completed, users will be presented with a review screen that allows them to review the questions from that segment.) |
|
Segment 3: In-Test Survey Part B |
TE | In-test survey questions 1–4 | Must be answered by the TE after administering the test to the student |
Segment 1
The first segment contains in-test survey questions 1 through 6 and is followed by a review screen (figure 26). LEAs may refer to the in-test survey questions within the Test Administration In-Test Survey Questions subsection of this manual. Remember that the TE must respond to these first six in-test survey questions prior to administering the test.
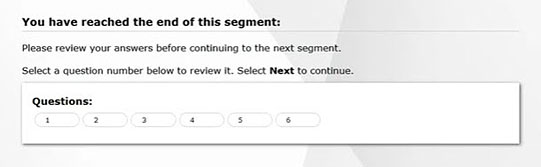
Figure 26. Review screen for in-test survey questions 1 through 6
Segment 2
The test segment contains the 30 test questions that must be administered one-on-one with the student, which is followed by a review screen (figure 27).
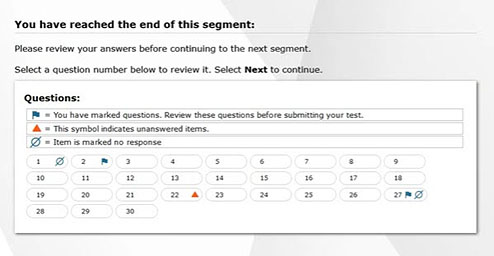
Figure 27. Sample Review screen after segment 2
A dialog box confirming that the student is ready to move beyond the segments follows (figure 28).

Figure 28. Leaving Current Segment dialog box
Segment 3
The third segment contains in-test survey questions 1 through 4, which is followed by a review screen (figure 29). LEAs may refer to the in-test survey questions within the Test Administration In-Test Survey Questions subsection of this manual. Remember that the TE must respond to these final four in-test survey questions after administering the test. Responses cannot be revisited after submitting the test.

Figure 29. Review screen for in-test survey segment 3: questions 1 through 4
Monitoring Progress in Test Administrator Interface
Test Administrator Site Layout
Figure 30 displays the layout of the Test Administrator Site during an active test session.
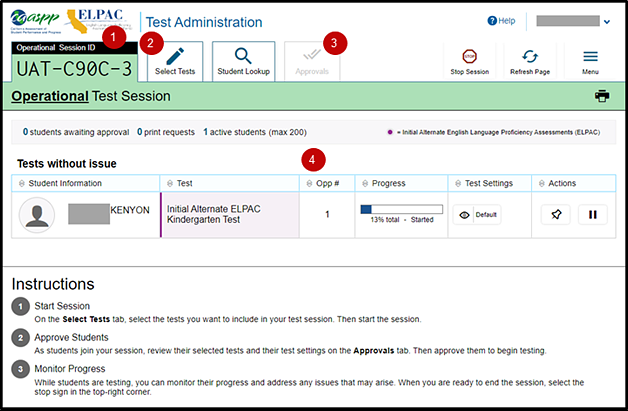
Figure 30. Test Administrator Site layout
Essential Features
The following are essential features in the Test Administrator Site:
- Session ID
- [Select Tests] tab
- [Approvals] tab
- Tests without issue table
Figure 31 and table 3 provide an overview of the major features available in the Test Administrator Site.

Figure 31. Top of Test Administrator Interface screen
| Feature | Description or More Information |
|---|---|
| Session ID | This section displays the unique ID generated for the test session after the test session has begun. |
| [Select Tests] tab | This tab opens the Test Selection window. |
| [Student Lookup] tab | This tab starts the process to search for student information. |
| [Approvals] tab | This tab opens the Approvals and Student Test Settings window after starting a test session. |
| [Help] button | This button displays an online help guide. |
| [Name] drop-down list | This drop-down list displays the Logout option. |
| Logout button | This option logs the TE off the Test Administrator Interface. Refer to the subsection Logging Off. |
| [Stop Session] button | This button ends the existing test session. |
| [Refresh Page] button | This button updates the on-screen information during a test session. |
| Menu drop-down list | This drop-down list displays the Toggle Screensaver option and the Approved Requests option. |
| Toggle Screensaver option | This option toggles the screen saver feature. Refer to the subsection Enabling Screen Saver Mode. |
| Approved Requests option | This option displays a list of print requests approved during the current session. Refer to the subsection How to Approve Print Requests. |
| [Print] icon | This icon starts the process to print the screen. |
| Tests without issue and Test with potential issues tables | These tables display the testing progress for approved students in the test session. Entries in each table are based on whether or not the student requires assistance with the test session (for example, if a student had submitted a print request). This feature appears after approving a student for testing. |
Alert Messages
The CDE can send statewide alerts that appear as pop-up messages on the Test Administrator Site. Refer to the sample in figure 32.
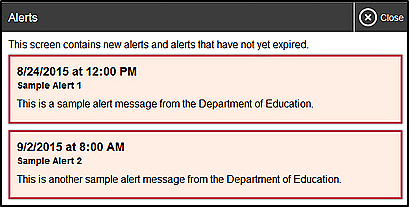
Figure 32. Record of alerts
How to Monitor Test Progress
A TE may also use the Test Administrator Interface to view the testing progress of any student. This screen will not show test questions or scores but will let the TE know the percentage of questions that have been delivered to the student.
At the start of the test, the student in the session is listed in the Tests without issue table. If the Test Administrator Interface detects a pending print request or a student’s test having been paused because of an environment security breach or because of the launch of a forbidden application, the Tests with potential issues table appears at the top.
The Progress column in the Tests table is called out in figure 33.
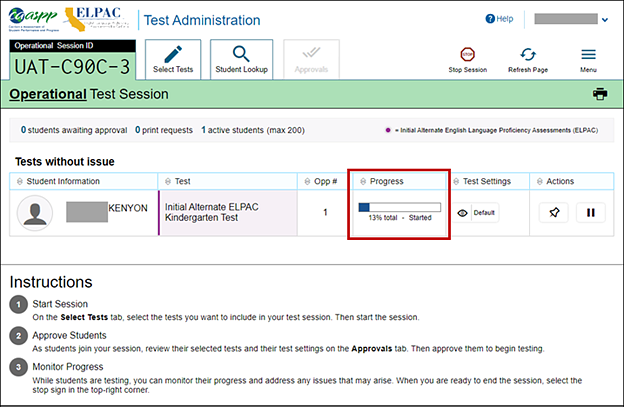
Figure 33. Monitoring student progress in the Test Administrator Interface
Table 4 describes the columns in the Tests table.
| Column | Description |
|---|---|
| Student Information | The first name, last name, and SSID of the student in the session (as it appears in CALPADS and TOMS). |
| Test | This column displays the name of the student’s selected test. |
| Opp # | This column displays the opportunity number for the student’s selected test. Each student has only one opportunity. |
| Progress | This column displays the student progression through the test that shows the number of items answered from the number of items available as well as including a status. Statuses are listed in table 5. |
| Test Settings |
This column displays one of the following: Default: Default test settings are applied for this test opportunity; there were no additional test settings assigned in TOMS for this student. Custom: One or more of the student’s test settings or universal tools, designated supports, or accommodations differ from the default settings. To view the student’s settings for the current test opportunity, select the [View] icon [ |
| Actions |
The icons in this column allow performance of an available action for an individual student’s test. Select the [Pause] double-line [ The [Pin] push-pin [ When a student approved for and assigned the print-on-demand designated support requests a printout of a reading passage or other test material, a [Print] button will appear in this column. Select the [Print] button to review and authorize or deny the student’s request. For more information, refer to the subsection How to Approve Print Requests. |
 ].
]. ] icon to pause a student’s test. When a test pauses, this column displays an information button that opens a pop-up message explaining how the test became paused. For more information, refer to the
  ] icon allows educators to bring specific tests into focus at the top of the screen during test session monitoring. This might be useful if a student needs extra time, has issues with focus, or has experienced technical issues during testing.
Table 5 describes the status under the student’s progress in the Progress column of the Tests table.
| Status | Description |
|---|---|
| Approved | The student has been approved but has not yet started the assessment. |
| Started | The student started the test and is actively testing. |
| Review | The student visited all questions and is currently reviewing answers before completing the test. |
| Reported | The test has been submitted, passed Cambium’s quality assurance checks, and was sent downstream for processing and scoring. |
| Paused* | The student’s test is paused. The time listed indicates how long the test has been paused. |
| Expired* | The test was not completed by the end of the testing window and the opportunity expired. |
| Pending* | The student is awaiting approval for a new test opportunity. |
| Suspended* | The student is awaiting approval to resume a test opportunity. |
* Statuses marked with an asterisk (*) appear when the student is not actively testing. The student’s row grays out in such cases.
Test Security
If the TE witnesses or suspects the possibility of a test security incident, the site ELPAC coordinator and LEA ELPAC coordinator should be contacted immediately in accordance with the security guidance provided in the Test Security section of this manual.
Enabling Screen Saver Mode
Because the student test progress tables in the Test Administrator Interface may contain sensitive student information, such as SSIDs, there is a screen saver built into the Test Administrator Interface that will be active in the web browser application window either when the TE activates it, or it will activate automatically if the TE is not active in the Test Administrator Interface for five minutes. It turns off when the TE returns the device’s focus to the web browser window by, for example, moving a mouse’s cursor over it. It will also turn off automatically if the test session times out because of TE or student inactivity. The TE should turn on the screen saver once the TE has approved the test since the TE will not need to be monitoring the assessment on this device.
The screen saver masking hides data from view and shows the session ID, as presented in figure 34. When students are awaiting approval when the screen saver is active, this information is included under the session ID.
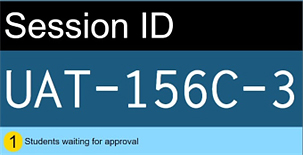
Figure 34. Sample session ID in the Test Administrator Interface screen saver
The TE can turn the screen saver on manually by selecting the Toggle Screensaver option from the Menu drop-down list. The Toggle Screensaver option is indicated in figure 35.

Figure 35. Toggle Screensaver option
How to Approve Print Requests
A student using the print-on-demand tool can request printouts of test passages and questions. The print-on-demand designated support must be assigned in the test settings in TOMS. When the print request is selected, the request notification appears in the Tests with potential issues table (figure 36).
To submit print requests:
-
Select the [Print] printer [
![[Print] printer icon.](/s/alt-elpac-tam/administering-to-students/administering-online-test-session/2023-clip_image086.jpg) ] icon in the top navigation bar in the student interface. The request will be sent to the Test Administrator Interface for the TE to approve (figure 36).
] icon in the top navigation bar in the student interface. The request will be sent to the Test Administrator Interface for the TE to approve (figure 36).
Figure 36. Print Request Sent to Test Administrator dialog box
To approve print requests:
-
Select the [Print] printer [
![[Print] printer icon.](/s/alt-elpac-tam/administering-to-students/administering-online-test-session/2023-clip_image086_0000.jpg) ] icon in the Actions column of the Tests with potential issues table (figure 37).
] icon in the Actions column of the Tests with potential issues table (figure 37).
Figure 37. Tests with potential issues table [Print] icon
-
Review the print request in the Student Print Request(s) window (figure 38) and then take one of the following actions:
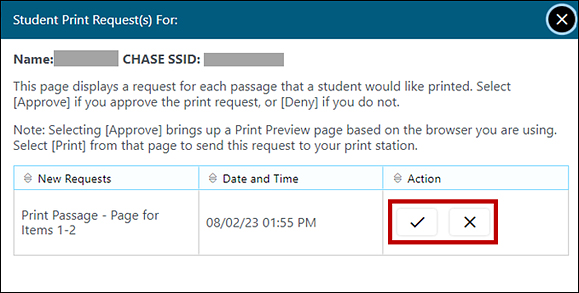
Figure 38. Student Print Request(s) window
- To approve the request, select the [Approve] check mark [
![[Approve] check mark icon.](/s/alt-elpac-tam/administering-to-students/administering-online-test-session/2023-clip_image093.jpg) ] icon in the Action column. Proceed to step 3.
] icon in the Action column. Proceed to step 3. - To deny the request, select the [Deny] “X” [
![[Deny] 'X' icon.](/s/alt-elpac-tam/administering-to-students/administering-online-test-session/2023-clip_image095.jpg) ] icon in the Action column. In the window that appears, enter a brief reason for denying the request and select the [Deny] button. Entering a reason for denial is optional. Do not proceed to step 3.
] icon in the Action column. In the window that appears, enter a brief reason for denying the request and select the [Deny] button. Entering a reason for denial is optional. Do not proceed to step 3.
- To approve the request, select the [Approve] check mark [
- A printer dialog box opens with a cover page and the items that were selected to print.
- Select [Print] to print the requested test elements.
Viewing Approved Requests
To view approved requests:
-
Select Approved Requests from the Menu drop-down list (figure 39). The Approved Requests window opens (figure 40), listing print requests by student.

Figure 39. Approved Requests option on Test Administrator Interface
-
The Approved Requests window opens, listing print requests by student. To print the list of approved requests, select the [Print] button (figure 40).
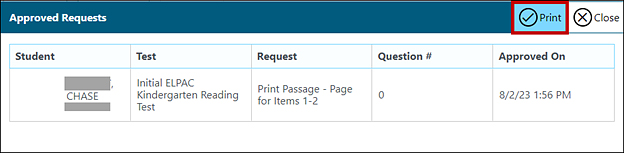
Figure 40. Approved Requests window
Ending a Test Session
After answering the in-test survey questions in the third segment, select the [Next] button to proceed to the End Test review screen.
Once the TE has reviewed the answers to the third segment, which is the last four in-test survey questions, the TE must select [Submit Test] on the Submit Test screen to submit the test (figure 41).
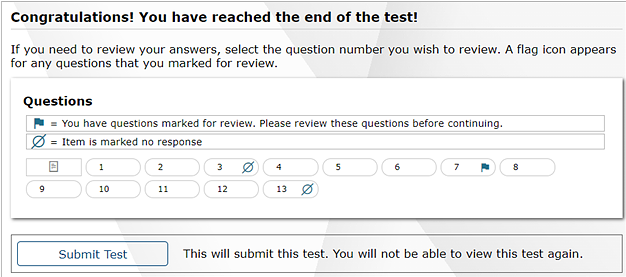
Figure 41. Submit Test screen
After the TE submits the test, the Test Summary screen appears, displaying the student’s name, the test name, and the completion date (figure 42).
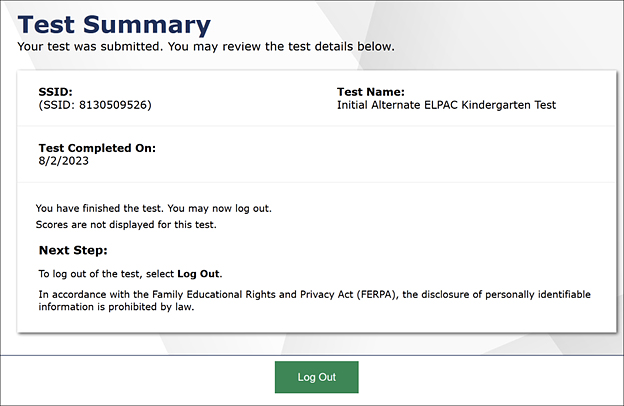
Figure 42. Test Summary screen
The TE should select the [Stop Session] button (figure 39) to end the test session; when selected, the Important! message box appears (figure 43).
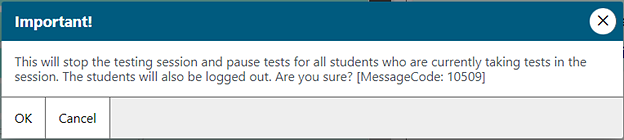
Figure 43. Important! message box
When finished, the TE can log off the Test Administrator Interface by selecting the [Name] drop-down list at the top right and then selecting Logout. The TE should also collect any picture cards, scratch paper, and other secure materials and follow procedures for local secure destruction as outlined in the Handling Secure Printed Materials subsection.
Logging Off
Use caution when logging off the Test Administrator Interface, as this will log off other related systems (for example, TOMS). To log off the Test Administrator Interface, select the [Name] drop-down list in the top-right corner of the screen, and then select Logout (figure 44).
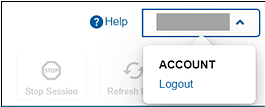
Figure 44. Logout option under the [Name] drop-down list
The session will close, and the TE will be directed to the ELPAC website after the TE logs off.
Data Entry Interface for Second Scoring
Overview
Each year, a subset of schools will be required to participate in second scoring for the Summative Alternate ELPAC. For further directions on second scoring, please refer to the Second Scoring subsection of this manual.
The secondary TE must be present at all times during test administration. Questions that require second scoring will have the [Second Scoring] double check marks [ ] icon next to the item within the DFA. At the time of testing, the secondary TE will observe the student’s response to rubric-scored test questions, then use the rubric in the DFA to score the student’s response to the test question (figure 45). This score should reflect independent judgment.
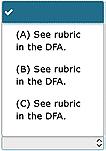
Figure 45. Rubric in the DFA
While the TE is administering the assessment, the secondary TE can either enter scores directly into the DEI during testing, if using a different device; or record the score in the answer recording sheet on the last page of the DFA (in appendix C) for entry into the DEI after testing but before the end of the test administration window. This score should reflect independent judgment. figure 46. Remember that in the DFA scripts, receptive test questions are marked with an “R” [ ] icon and expressive test questions with an “E” [
 ] icon. The secondary TE must only record answers to expressive test questions. Appendix C of the DFA contains the Answer Recording Sheet for Second Scoring, as shown in figure 46.
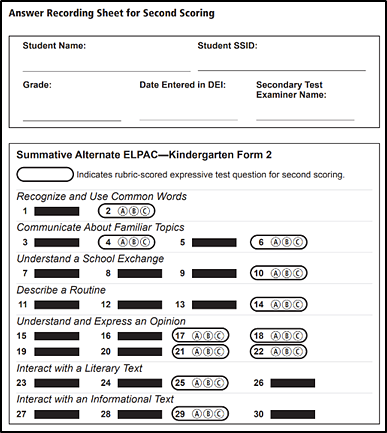
Figure 46. Sample Answer Recording Sheet for Second Scoring for kindergarten
Using the Data Entry Interface
All second scores should be entered into the DEI before the end of the test administration window, either by the secondary TE or the designated data entry staff who have been trained. For directions on logging on to the DEI, follow the instructions in the Using the DEI section in the Summative ELPAC Online Test Administration Manual. If responses were not entered into the DEI in real time, then use the responses from the Answer Recording Sheet for Second Scoring when entering data into the DEI.
After the user logs on to the DEI, the DEI presents a screen for the user to select the assessment for the student. On the Available Tests screen, select the orange [Alternate ELPAC - Second Scoring Data Entry] button for the Alternate ELPAC (figure 47).
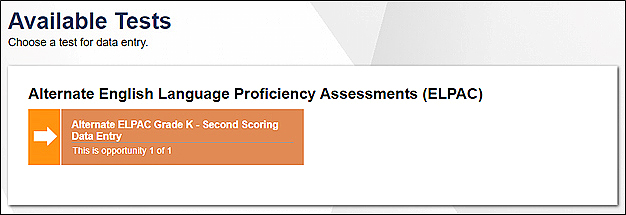
Figure 47. Available Tests selection box
After selecting the appropriate test for the student (figure 47), an introductory screen will appear with directions (figure 48). Select [Next] to continue entering scores.
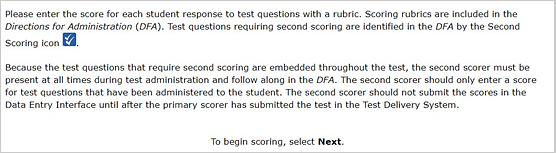
Figure 48. Introductory screen
Before the secondary TE inputs scores for the items, the DEI will display the question number that requires a second score (figure 49). Please make sure to check if the question number matches the DFA. Select [Next] to continue entering scores.

Figure 49. Sample instructions for TE
After scores for all items have been entered, an instructional screen will appear (figure 50). Make sure to review all the responses before ending the test.

Figure 50. Instructional screen for TE
Then, select the [Next] button to proceed to the Data Entry Summary screen (figure 51). Only select the [Submit Test] button when ready to end the test.
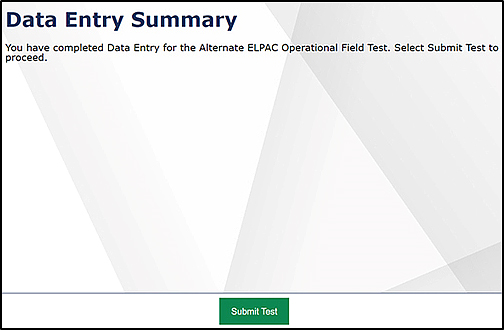
Figure 51. Data Entry Summary screen
A dialog box will appear (figure 52). Select [Yes] to end the test.
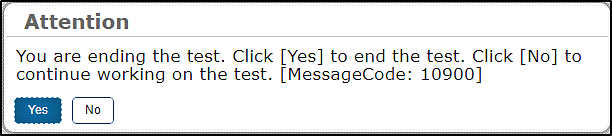
Figure 52. Attention dialog box
A Test Submission Record screen will appear to confirm the SSID, test name, and the date when the test administration was completed in the DEI (figure 53). Select one of the following options: [Log Out], [Enter Responses for a Different Test], or [Enter Responses for a Different Student].
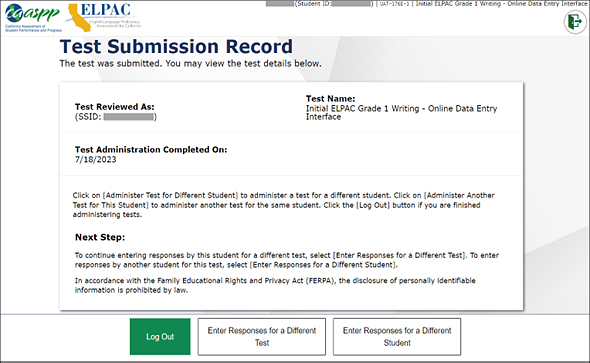
Figure 53. Test Submission Record screen
Following Test Administration
Destroying Test Materials
As a reminder, the printed and paper test materials identified in the Test Security section must be securely destroyed immediately following each test session and may not be retained from one test session to the next.
Reporting Testing Improprieties, Irregularities, and Breaches
Throughout testing, ensure that all test security incidents are reported in accordance with the guidelines in the Test Security section in this manual (that is, LEA ELPAC coordinators or site ELPAC coordinators must follow the ELPAC STAIRS/Appeals process in TOMS).