STAIRS: Overview
The following is important information regarding STAIRS and Appeals:
- LEA CAASPP and test site coordinators must ensure that all test STAIRS cases are documented by means of the STAIRS/Appeals process.
- Some STAIRS cases may require an Appeal to reset, restore, rescore (Initial ELPAC only), reopen, invalidate (CAASPP only), or request a grace period extension for a test.
- The type of Appeal is determined and submitted when the STAIRS case is submitted.
- Not all STAIRS cases will result in an Appeal. However, to request an Appeal, a STAIRS case must be submitted.
- A complete list of all Appeals and testing issues can be found in the CAASPP and ELPAC Security Incidents and Appeals Procedure Guide.
Introduction
LEA and test site coordinators can use the New STAIRS screen to enter new test security or test administration–related STAIRS cases into TOMS.
To open the New STAIRS screen (figure 1), select the [STAIRS] navigation tab from the top navigation bar.

Figure 1. New STAIRS Navigation
The following links provide instructions for moving new STAIRS cases through the STAIRS/Appeals process:
- Quick Instructions
- Detailed Instructions
- Background Information—Enter the background information for a STAIRS case.
- Testing Issues—Indicate the testing issue to be reported.
- Student Information—Provide the associated SSID(s) and a brief description of the STAIRS case.
- Confirm Details—Verify and confirm the details of the STAIRS case.
- Submit—Submit the new STAIRS case.
Quick Instructions
Follow these steps to enter a new STAIRS case:
- On the Background Information progress step, enter the background information for the student(s) associated with the new STAIRS case. All fields are required.
- On the Testing Issues progress step, select a testing issue for the STAIRS case.
- The type of testing issues listed in this step are subject to the “Test Name” selected in the Background Information progress step.
- The “Select Testing Issue” section is divided into two screens. The first screen is displayed below the STAIRS ID with the text “Select Testing Issue” and includes the list of available STAIRS case types.
- The content of the second screen is dependent on which testing issue is selected on the first screen.
- A unique STAIRS ID is created at this step. Make a note of it. It is required while using the [Search STAIRS] action tab to search for STAIRS cases.
- A STAIRS case can be saved as a draft starting with this step through the final submission of the STAIRS case. (Refer to “Important Information About Saving a STAIRS Case as a Draft,” at the end of these quick instructions.)
-
On the Student Information progress step, enter the number of students involved in the STAIRS case, the SSIDs of the students involved in the STAIRS case, and a description of the issue for CalTAC. All fields are required.
- On the Confirm Details progress step, view and confirm the details of the STAIRS case issue. Review all the details very carefully.
- On the Submit progress step, submit the STAIRS case issue. Enter a comment for CalTAC or the CDE, as needed.
- If the STAIRS case does not require an Appeal, information related to the student test will have a value of “N/A” displayed in the box titled “Student Case(s).”
- If the STAIRS case results in an Appeal, the appealable SSID(s) included in the STAIRS case will have real-time details about the student’s test.
- If the student’s test status does not allow for the requested Appeal, the user will receive this message: “There is no appealable testing opportunity for the SSID(s) associated with this STAIRS case.”
Important Information About Saving a STAIRS Case as a Draft
To save a draft copy of the STAIRS case without submitting it, select the [SAVE AS DRAFT] button. Once the [SAVE AS DRAFT] button is selected, the user is directed to the [Search STAIRS] action tab. Drafts can be searched using the drop-down list for the STAIRS Status box, on the Search STAIRS page.
Note the following points about saving a STAIRS case as a draft:
- If a STAIRS case is saved as a draft, it will be saved for the remainder of the LEA’s test administration window. To submit a STAIRS case that has been saved as a draft, the user must first use the Search Appeals screen to locate the case, update any information as necessary, and submit the case using the steps that follow.
- STAIRS cases that are saved as drafts are not reviewed by CalTAC or the CDE and are not valid until submitted.
- STAIRS cases that are saved as drafts can be deleted by the LEA coordinator.
Detailed Instructions
To open the New STAIRS screen (figure 2), select the [STAIRS] navigation tab from the top navigation bar.
Figure 2. New STAIRS Navigation
Follow these steps to enter a new testing STAIRS case:
- Background Information—Enter the background information for a STAIRS case.
- Testing Issues—Indicate the testing issue to be reported in the new STAIRS case.
- Student Information—Provide the associated SSID(s) and a brief description of the case.
- Confirm Details—Verify and confirm the details of the case.
- Submit—Submit the new STAIRS case.
-
Background Information
Use the Background Information progress step (figure 3) to enter the background information for the new STAIRS case. All fields on this screen are required.
- In the School field, select the school associated with the STAIRS case. Enter at least the first five characters of the school’s name or CDS code, and then select from the resulting list.
- In the Date of Testing Incident field, select the calendar [
 ] icon to choose the date the incident occurred. Once selected, the date is displayed in MM/DD/YYYY format. The user cannot select a future date.
 - In the Grade Affected field, select the grade associated with the incident.
- In the Test Name field, select the test associated with the incident.
- In the Test Type or Domain field, select the test type or domain associated with the incident.
- In the Test Delivery or Score Entry field, select the delivery mode associated with the incident.
-
When entering a STAIRS case for the K–2 Writing domain, the Test Delivery or Score Entry field should have Online selected if the other three domains were administered online.
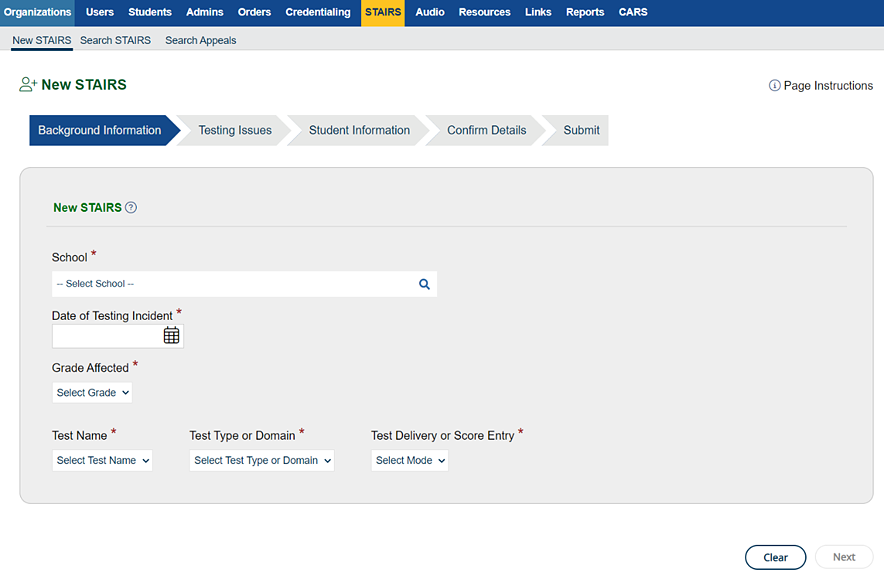
Figure 3. Background Information Progress Step
-
Testing Issues
Use the Testing Issues progress step (figure 4) to select a testing issue for the STAIRS case.
- Select the radio button that corresponds to the STAIRS case type.
- The types of testing issues listed in this step are specific to the “Test Name” selected in the Background Information progress step.
- Depending on the selected testing issue, a second screen may request further information.
- A unique STAIRS ID is created at this step. Make a note of it. It is required while using the [Search STAIRS] action tab to search for STAIRS cases.
-
A STAIRS case can be saved as a draft starting with this step through the final submission of the STAIRS case. (Refer to “Important Information About Saving a STAIRS Case as a Draft,” at the end of these quick instructions.)
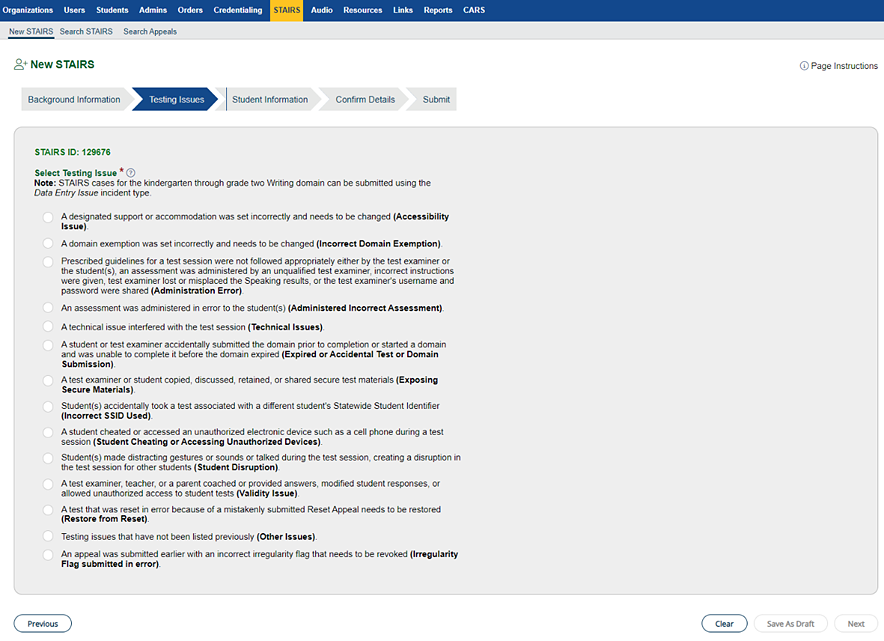
Figure 4. First “Select Testing Issue” Section
- If more information is required after a STAIRS case type is selected, additional questions will be displayed on a second Select Testing Issue screen. Figure 5 is an example of a second screen that includes one follow-up question.
- To respond to the questions on the second “Select Testing Issue” section, select the appropriate radio button. Follow the instructions on the screen to ensure that each follow-up question is answered.
- Select the radio button that corresponds to the STAIRS case type.
-
Second “Select Testing Issue” Section
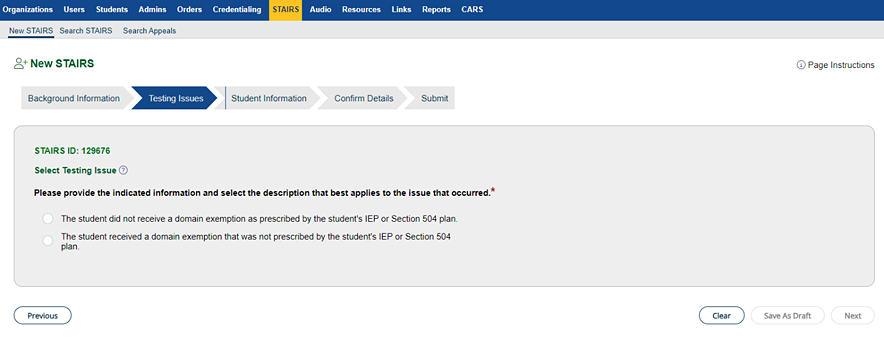
Figure 5. Second “Select Testing Issue” Section
-
Student Information
Use the Student Information progress step (figure 6) to enter the number of students involved in the STAIRS case, the SSIDs of the students affected by the STAIRS case, and a description of the issue for CalTAC. All fields are required.
- All of the fields under the Student Information progress step are required.
- Depending on the type of issue selected in the “Select Testing Issue” sections, the Student Information progress step can be bypassed, and the user is taken directly to the Confirm Details progress step.
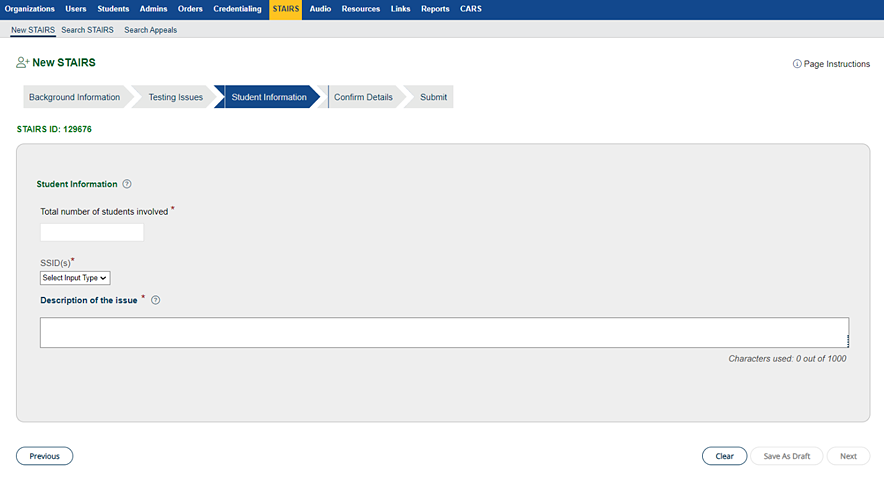
Figure 6. Student Information Progress Step
Take the following steps to enter information related to a STAIRS case:
- Enter the required fields and select the [NEXT] button.
- Depending on the number of students involved, users can enter the SSIDs of the students either manually via screen input or using a template via the bulk upload option.
- If the number of students involved is 10 or fewer, screen input is the default option, and fields are displayed in which the user can manually enter each SSID (figure 7).
- For more than 10 students, the SSIDs must be uploaded through the bulk upload option, using a template (figure 8).
- From the SSID(s) drop-down list, select one of the two input types:
- Screen Input
- Upload Option
- In the Description of the Issue box, enter a description of the issue, using a maximum of 1,000 characters. The description should contain additional information about the case and not just restate the testing issue selected on the previous screens.
-
If the screen input option was selected, enter the SSID(s) in the indicated field(s).
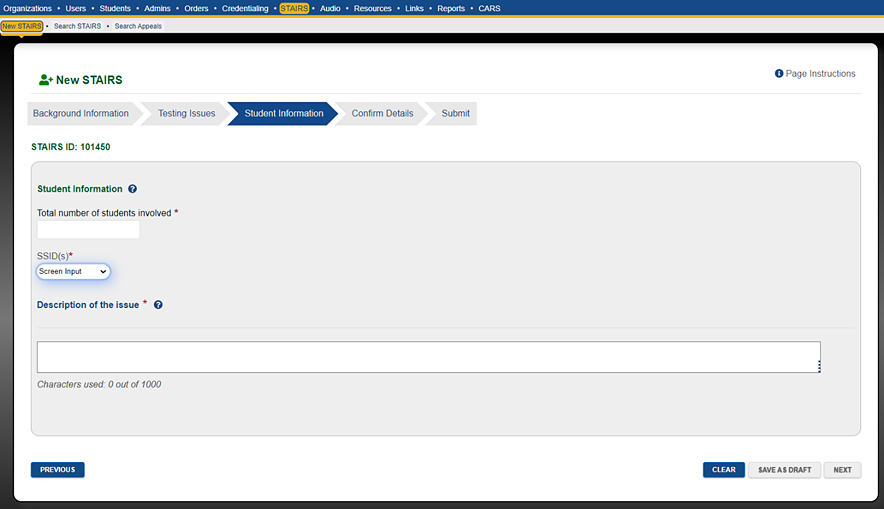
Figure 7. Student Information Progress Step—Screen Input Option
-
If the upload option was selected: After entering a description of the issue, select the [NEXT] button; the “Prepare File for Upload” section of the Student Information progress step is displayed (figure 8).
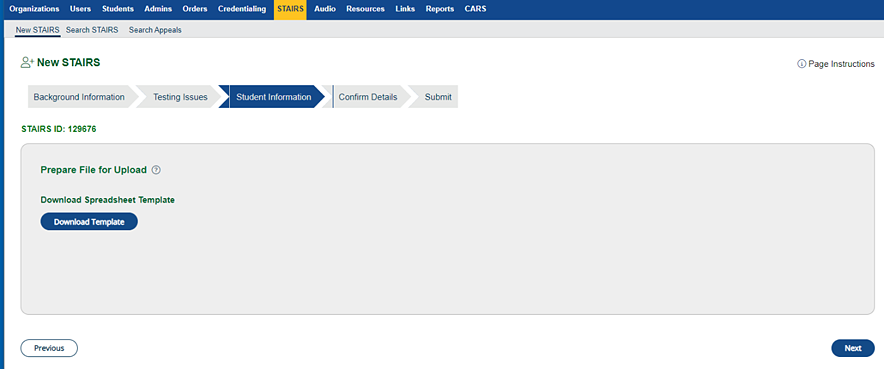
Figure 8. Prepare File for Upload
- Select the [DOWNLOAD TEMPLATE] button to download an empty STAIRS_SSID_Upload Excel template.
- Follow the directions in the downloaded Excel template to enter the SSID of each student involved in the STAIRS case.
- After entering the SSIDs into the template, save the template to a local device as an.xlsx file, and then select the [NEXT] button.
- The option to select the file to upload is displayed (figure 9).
-
Select the [Choose File] button to choose the STAIRS SSID Upload file to be uploaded, and then select the [NEXT] button.
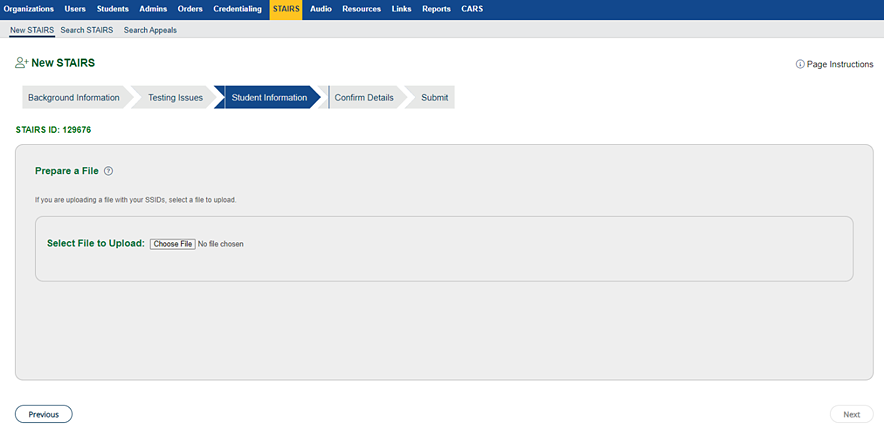
Figure 9. Select File to Upload, Google Chrome
- At this point, the “File Validation Results” section is displayed (figure 9).
- If there are errors in the uploaded file, the Status column displays the word “Errors” as well as the blue [Download File] blue download arrow [
 ] icon in the “Actions” column (figure 10). Select this icon to view the.csv file listing the errors contained in the uploaded file. All errors must be corrected before uploading the file again.
 -
If there are no errors in the uploaded file, the “Status” column displays the word “Success” (figure 11).

Figure 10. “File Validation Results” Section, Errors in File
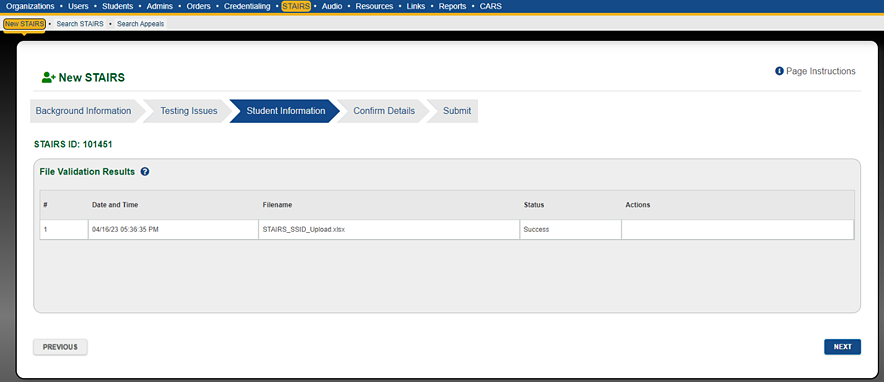
Figure 11. “File Validation Results” Section, No Errors
-
After all errors have been resolved and the [NEXT] button is selected, the Student Information progress step is displayed with all fields completed. If the SSID(s) were manually entered, they also are displayed on the screen.
- Invalid SSIDs were entered.
- Nonnumeric text was entered in the SSID column.
- SSIDs associated with a different school were entered.
-
Confirm Details
Use the Confirm Details progress step (figure 12) to view the details of the new STAIRS case and ensure accuracy before submitting it.
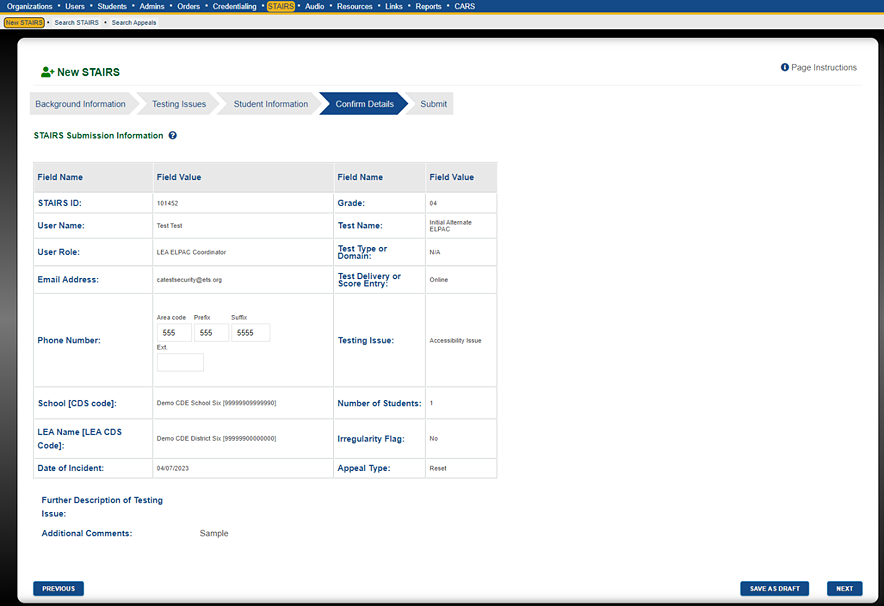
Figure 12. Confirm Details Progress Step
-
Submit
Use the Submit progress step to submit the STAIRS case. Information regarding the STAIRS case appears under the STAIRS ID, including whether or not the case is eligible for an Appeal.
- If the STAIRS case does not require an Appeal, information related to the student’s test will have a value of “N/A” displayed in the “Student Case(s)” section.
-
If the STAIRS case results in an Appeal, the SSID(s) included in the STAIRS case will be listed along with details about the test(s) (figure 13).
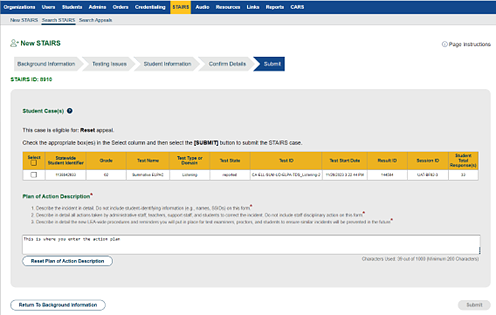
Figure 13. Submit Progress Step
- Some testing incidents for the Initial ELPAC, the Initial Alternate ELPAC, the Summative ELPAC, and the Summative Alternate ELPAC require that a corrective plan of action be provided by the LEA within the case description at the time of submitting the STAIRS case (figure 13). For more information, refer to the ELPAC Plan of Action section in the CAASPP and ELPAC Security Incidents and Appeals Procedure Guide.
- For ELPAC, the user can select the [Reset Plan of Action Description] button to clear any text entered into the “Plan of Action Description.”
- For CAASPP, the user can add an optional comment or question for CalTAC or the CDE in the “Comments” section of these screens. No more than 1,000 characters can be entered.
- Once the STAIRS case is submitted, the description provided in this section will be displayed in the [Notes] action tab of the STAIRS Summary screen. The [Notes] action tab will display all communication between the LEA and the approver for the STAIRS ID.
To finish submitting the STAIRS case:
- If the student’s test status does not allow for the requested Appeal, the user will receive the message “There is no appealable testing opportunity for the SSID(s) associated with this STAIRS case.” Please verify student test status in the Completion Status Report System. Refer to the Guide to CAASPP and ELPAC Completion Status for more information.
- Select all the SSID(s) that should be included as part of the STAIRS case by checking the boxes in the “Select” column of Student Case(s).
- The SSID(s) that are not selected under Student Case(s) are not counted as part of the Appeal submitted or as part of the STAIRS case if it is nonappealable.
- If the information shown is correct and any optional comments or questions have already been entered in the “Comments” section, select the [SUBMIT] button to submit the case. A confirmation pop-up message appears, asking whether the user wants to continue submitting the STAIRS case (figure 14).
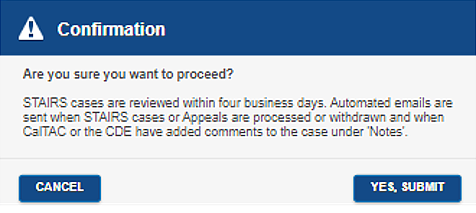
Figure 14. Submit a STAIRS Case Confirmation Pop-Up Message
- Select the [CANCEL] button to close the pop-up message and return to the Submit progress step.
- Select the [YES, SUBMIT] button to submit the STAIRS case.
- When the [YES, SUBMIT] button is selected, the user is taken to the “STAIRS Summary” section of the Search STAIRS screen to view a summary of the submitted STAIRS case.