Administering a Computer-Based Test Session
This section contains information on entering student responses into the system, monitoring progress in the Test Administrator Interface, and approving print requests. The steps for starting and ending the test session and logging the student on to the TDS are found in How to Start an Alternate ELPAC Test Session (PDF).
Assessment Colors in the Test Administrator Interface
Each assessment is displayed in the Test Administrator Interface using a differently colored background. The appearance changes slightly to highlight when a list item receives focus (that is, when the cursor is hovered over the item), as presented in the following lists:
Computer-Based Assessments:
- Green—all interim assessments
- Red—Smarter Balanced Summative Assessments
- Indigo—California Alternate Assessments (CAA)
- Brown—California Science Test (CAST)
- Mint—California Spanish Assessment (CSA)
- Teal—Initial ELPAC
- Blue—Summative ELPAC
- Orange—Summative Alternate ELPAC
- Purple—Initial Alternate ELPAC
Online Practice and Training Tests:
- Pink—All practice tests
- Golden Yellow—All training tests
A test session must be created before the TE can log the student on to the secure student browser. For a student to take a specific assessment, the assessment must be selected in the test session.
Entering Student Responses into the System
A student or the TE may enter responses into the testing device using a mouse, keyboard, or other assistive technology as necessary. The DFAs and training materials include guidance on the use of engagement strategies, including the “Mark as No Response” functionality and the use of pauses and breaks, so that TEs can identify when it is appropriate to continue administering the assessment or when it is appropriate to stop testing and submit the assessment.
LEAs can refer to the Response Options for Alternate Assessments flyer for more information on what to do during the assessment based on the student’s needs, skills, and abilities. Decisions on how to administer an assessment to each student should be informed by the TE’s knowledge of the individual student.
Using the Mark as No Response Feature
TEs should follow guidance in the DFAs and training on the use of engagement strategies, including the use of the “Mark as No Response” option. For cases where the student is presented with a question and does not respond, after attempts to reengage the student have been made either the same day or during another session, TEs should use the “Mark as No Response” option.
On each test question within the student interface, TEs have the ability to select Mark as No Response in the context menu. Questions that have been marked as no response can be presented to the student again as appropriate. If the TE determines that the student’s assessment should be stopped and submitted, the TE should be sure that at least one receptive and one expressive test question have been responded to or have Mark as No Response selected in the context menu to count the student as having participated in the assessment. Questions that have been marked as no response will have this symbol of a circle with a diagonal line through it:  .
.
Note that to be considered as having participated in the Alternate ELPAC, a response must be indicated using the MC options or Mark as No Response in the context menu for, at minimum, one receptive test question and one expressive test question. If a student’s assessment is submitted without a response for at least one expressive test question and one receptive test question, then the student will not be counted as having participated. In the administration scripts in the DFAs, receptive test questions are marked with an “R” [ ] icon, and expressive test questions with an “E” [
 ] icon. LEAs can refer to the Alternate ELPAC Participation and Scoring flyer for more information.
Figure 1 shows how to select Mark as No Response in the TDS. A warning will appear. More information on the “Mark as No Response” feature is available in the DFA.

Figure 1. Mark as No Response list item
Figure 2 shows the warning that appears when the “Mark as No Response” feature is used.

Figure 2. “Mark as No Response” warning message box
Pause Rules
The pause rules that follow apply regardless of whether the student or the TE pauses the assessment, or whether there was a technical issue (for example, power outage or network failure) that resulted in the student being logged off. The same pause rules used on the CAAs apply to the Alternate ELPAC. For example, the TE may pause and resume the assessment as many times as necessary to allow the student to perform well, even if this means that an assessment will be administered over a number of days. However, once the testing window has closed, all open assessments will be force-submitted, and students will not be able to continue testing. LEAs can refer to the Response Options for Alternate Assessments flyer for more information on when to pause and resume testing during the assessment.
Test Time-Out (Due to Inactivity)
As a security measure, the student and TE are automatically logged off after 30 minutes of test inactivity. For the student, activity is defined as selecting an answer or navigation option in the assessment (for example, selecting [Next] or [Back] or using the Questions drop-down list to navigate to another item). Moving the mouse or selecting an empty space on the screen is not considered activity. This time-out also results in the assessment being paused automatically.
For the TE, activity means that the student is registering test activity. As long as the student is testing, the TE will not be logged off. If the student is not engaging with the items, the TE can pause and resume the assessment as many times as necessary, including over multiple days. Be sure to keep in mind that the assessment will expire at the end of the testing window. Before the secure browser logs the student off the assessment, a warning message will be displayed on the screen. If [OK] is not selected within 60 seconds after this message appears, the student will be logged off. Selecting [OK] will restart the 30-minute inactivity timer.
Figure 3 provides an example of the message that appears in a test time-out warning:
![Test timeout warning message that reads, "Are you still there? Click OK to continue or you will be logged out in 30 seconds. [Message Code: 10906]."](/s/alt-elpac-otam/administering-to-students/computer-based-test-session/2026-5b-image010.png)
Figure 3. Test time-out warning message
Test Expiration Rules
“Opportunities” refers to the number of times a student can take an assessment within a range of dates. The assessment remains active until the student completes and submits the assessment or until the assessment expires, whichever occurs sooner. The assessment will expire once the testing window has closed. Once a test opportunity expires, the student cannot complete or review the assessment unless a Reopen Appeal is submitted through STAIRS. Specifically for the Alternate ELPAC, once an assessment expires, a student cannot complete or review the assessment because the end of the testing window has been reached.
Estimated Testing Times
The Alternate ELPAC is an untimed assessment. Each task type is presented in each grade level or grade span. The estimated cumulative testing time for the Initial Alternate ELPAC is 40 to 60 minutes, and the Summative Alternate ELPAC is 60 to 90 minutes. This estimated testing time includes the presentation of student directions, stories, and test questions. The estimated testing time does not include logon and device setup time.
The estimated time for the administration of each task type is provided in table 1 for the Alternate ELPAC.
| Task Type | Kindergarten–Grade 2 | Grades 3–12 |
|---|---|---|
|
Recognize and Use Common Words |
About 9 minutes |
About 7 minutes |
|
Communicate About Familiar Topics |
About 4 minutes |
About 3 minutes |
|
Understand a School Exchange |
About 7 minutes |
About 5 minutes |
|
Describe a Routine |
About 7 minutes |
About 5 minutes |
|
Understand and Express an Opinion |
About 8 minutes |
About 7 minutes |
|
Interact with a Literary Text |
About 6 minutes |
About 6 minutes |
|
Interact with an Informational Text |
About 6 minutes |
About 6 minutes |
|
Field test sets (two sets; Summative Alternate ELPAC only) |
About 13 minutes |
About 11 minutes |
| Total: | 60 minutes | 50 minutes |
Beginning the Assessment
The steps for starting the test session and logging the student on to the TDS are found in How to Start an Alternate ELPAC Test Session (PDF).
Test Segment
The Initial Alternate ELPAC and Summative Alternate ELPAC each have only one segment that is administered one-on-one. The Initial Alternate ELPAC contains 24 test questions. The Summative Alternate ELPAC contains 30 test questions.
After the assessment is completed, the TE will be presented with a review screen that allows them to review the questions from the segment (figure 4).
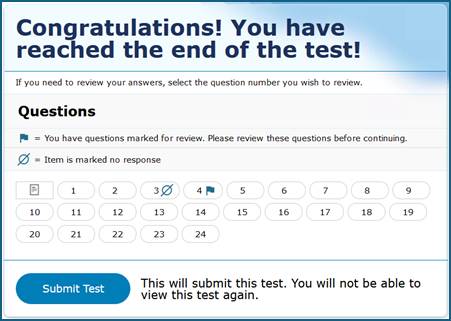
Figure 4. Sample Review screen
The final step is to submit the assessment. Responses cannot be revisited after submitting the assessment.
Monitoring Progress in the Test Administrator Interface
Test Administrator Site Layout
Figure 5 displays the layout of the Test Administrator Site during an active test session.
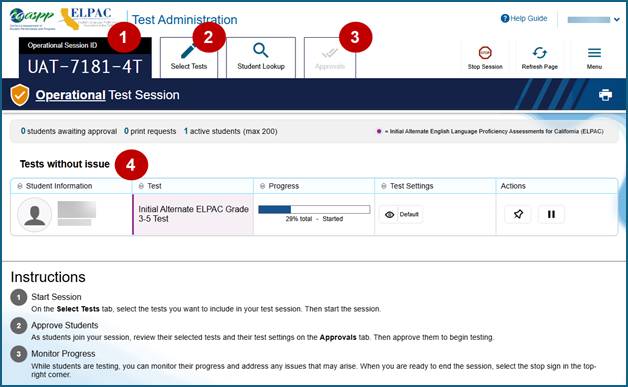
Figure 5. Test Administrator Interface layout
Essential Features
The following are essential features in the Test Administrator Site:
- Session ID
- [Select Tests] tab
- [Approvals] tab
- Tests with potential issues and Tests without issue table
Figure 6 and table 2 provide an overview of the major features available in the Test Administrator Site.

Figure 6. Top of the Test Administrator Interface screen
| Feature | Description or More Information |
|---|---|
|
Session ID |
This section displays the unique ID generated for the test session after the test session has begun. |
|
[Select Tests] tab |
This tab opens the Test Selection window. |
|
[Student Lookup] tab |
This tab starts the process to search for student information. |
|
[Approvals] tab |
This tab opens the Approvals and Student Test Settings window after starting a test session. |
|
[Help] button |
This button displays an online help guide. |
|
[Name] drop-down list |
This drop-down list displays the Logout and Back to Dashboard options. |
|
Logout option |
This option logs the TE off the Test Administrator Interface. Refer to the subsection Logging Off. |
|
[Stop Session] button |
This button ends the existing test session. |
|
[Refresh Page] button |
This button updates the on-screen information during a test session. |
|
Menu drop-down list |
This drop-down list displays the Toggle Screensaver option and the Approved Requests option. |
|
Toggle Screensaver option |
This option toggles the screen saver feature. Refer to the subsection Enabling Screen Saver Mode. |
|
Approved Requests option |
This option displays a list of print requests approved during the current session. Refer to the subsection Approving Print Requests. |
|
[Print] icon |
This icon starts the process to print the screen. Refer to the subsection Making a Record of Test Session Information. |
|
[Export] button |
This button, which appears only after the TA or TE selects the [Stop Session] button, downloads the status of the assessments that were paused. Refer to the subsection Making a Record of Test Session Information. |
|
Tests without issue and Tests with potential issues tables |
These tables display the testing progress for approved students in the test session. Entries in each table are based on whether the student requires assistance with the test session (for example, if a student had submitted a print request). This feature appears after approving a student for testing. |
How to Monitor Test Progress
A TE may also use the Test Administrator Interface to view the testing progress of any student. This screen will not show test questions or scores but will let the TE know the percentage of questions that have been delivered to the student.
At the start of the assessment, the student in the session is listed in the Tests without issue table. If the Test Administrator Interface detects a pending print request or a student’s assessment having been paused because of an environment security breach or because of the launch of a forbidden application, the Tests with potential issues table appears at the top.
The Progress column in the Tests table is called out in figure 7.
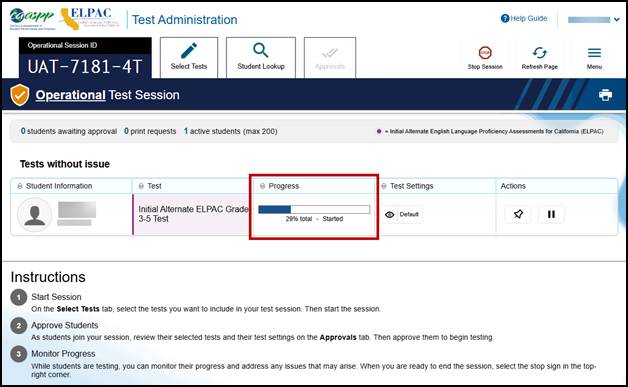
Figure 7. Monitoring student progress in the Test Administrator Interface
Table 3 describes the columns in the Tests table. To sort the table by a given column, select that column header.
| Column | Description |
|---|---|
|
Student Information |
The first name, last name, and SSID of the student in the session (as it appears in CALPADS and TOMS). |
|
Test |
This column displays the name of the student’s selected assessment. |
|
Opp # |
This column displays the opportunity number for the student’s selected assessment. Each student has only one opportunity. |
|
Progress |
This column displays a bar graph of the student’s progression through the assessment that shows the percentage of items answered from the number of items available as well as including a status. Statuses are listed in table 4. |
|
Test Settings |
This column displays one of the following: Default: Default test settings are applied for this test opportunity; there were no additional test settings assigned in TOMS for this student. Custom: One or more of the student’s test settings or universal tools, designated supports, or accommodations differ from the default settings. To view the student’s settings for the current test opportunity, select the [View] eye [ |
|
Actions |
The icons in this column allow performance of an available action for an individual student’s assessment. Select the [Pause] double-line [ The [Pin] push-pin [ When a student approved for and assigned the print-on-demand designated support requests a printout of a reading passage or other test material, a [Print] button will appear in this column. Select the [Print] button to review and authorize or deny the student’s request. For more information, refer to the subsection Approving Print Requests. |
 ] icon.
 ] icon to pause a student’s assessment. When an assessment pauses, this column displays an information button that opens a pop-up message explaining how the assessment became paused. For more information, refer to the
  ] icon allows educators to bring specific assessments into focus at the top of the screen during test session monitoring. This might be useful if a student needs extra time, has issues with focus, or has experienced technical issues during testing.
Table 4 describes the status under the student’s progress in the Progress column of the Tests table. Statuses marked with an asterisk (*) appear when the student is not actively testing. The student’s row grays out in such cases.
| Status | Description |
|---|---|
|
Approved |
The student has been approved but has not yet started the assessment. |
|
Started |
The student started the assessment and is actively testing. |
|
Review |
The student visited all questions and is currently reviewing answers before completing the assessment. |
|
Reported |
The assessment has been submitted, passed Cambium’s quality assurance checks, and was sent downstream for processing and scoring. |
|
Paused* |
The student’s assessment is paused. The time listed indicates how long the assessment has been paused. |
|
Expired* |
The assessment was not completed by the end of the testing window and the opportunity expired. |
|
Pending* |
The student is awaiting approval for a new test opportunity. |
|
Suspended* |
The student is awaiting approval to resume a test opportunity. |
Alert Messages
The CDE can send statewide alerts that appear as a pop-up banner at the top of the Test Administrator Interface. Refer to the sample in figure 8.

Figure 8. Alert banner in the Test Administrator Interface
Test Security
If the TE witnesses or suspects the possibility of a test security incident, the site ELPAC coordinator and LEA ELPAC coordinator should be contacted immediately in accordance with the security guidance provided in the Test Security chapter of this manual.
Enabling Screen Saver Mode
Because the student test progress tables in the Test Administrator Interface may contain sensitive student information, such as SSIDs, there is a screen saver built into the Test Administrator Interface that will be active in the web browser application window either when the TE activates it, or it will activate automatically if the TE is not active in the Test Administrator Interface for five minutes. It turns off when the TE returns the device’s focus to the web browser window by, for example, moving a mouse’s cursor over it. It will also turn off automatically if the test session times out because of TE or student inactivity. The TE should turn on the screen saver once the TE has approved the assessment since the TE will not need to be monitoring the assessment on this device.
The screen saver masking hides data from view and shows the session ID, as presented in figure 9. When students are awaiting approval when the screen saver is active, this information is included under the session ID.
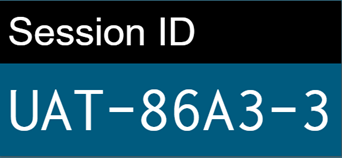
Figure 9. Sample session ID in the Test Administrator Interface screen saver
The TE can turn the screen saver on manually by selecting the Toggle Screensaver option from the Menu drop-down list. The Toggle Screensaver option is indicated in figure 10.
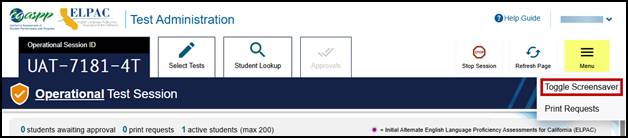
Figure 10. Toggle Screensaver option
Approving Print Requests
A student using the print-on-demand tool can request printouts of test passages and questions. The print-on-demand designated support must be assigned in the test settings in TOMS. When the print request is selected, the request notification appears in the Tests with potential issues table (figure 16). The print-on-demand designated support must be assigned in the test settings in TOMS.
To submit print requests:
-
Select the [Print] printer [
![[Print] printer icon.](/s/alt-elpac-otam/administering-to-students/computer-based-test-session/2026-5b-image021.jpg) ] icon in the top navigation bar in the student interface. The request will be sent to the Test Administrator Interface for the TE to approve (figure 11).
] icon in the top navigation bar in the student interface. The request will be sent to the Test Administrator Interface for the TE to approve (figure 11).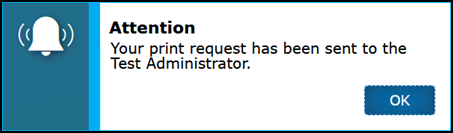
Figure 11. Print Request Sent to Test Administrator dialog box
To approve print requests:
-
Select the [Print] printer [
![[Print] printer icon.](/s/alt-elpac-otam/administering-to-students/computer-based-test-session/2026-5b-image023.jpg) ] icon in the Actions column of the Tests with potential issues table (figure 12).
] icon in the Actions column of the Tests with potential issues table (figure 12).
Figure 12. Tests with potential issues table [Print] icon
-
Review the print request in the Student Print Request(s) window (figure 13) and then take one of the following actions:
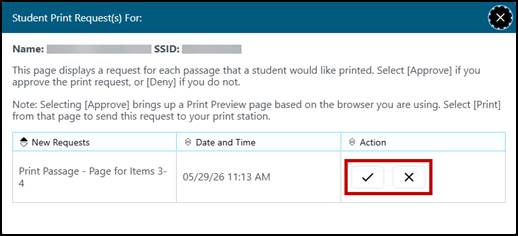
Figure 13. Student Print Request(s) window
- To approve the request, select the [Approve] check mark [
![[Approve] check mark icon.](/s/alt-elpac-otam/administering-to-students/computer-based-test-session/2026-5b-image026.jpg) ] icon in the Action column. Proceed to step 3.
] icon in the Action column. Proceed to step 3. - To deny the request, select the [Deny] “X” [
![[Deny] "X" icon.](/s/alt-elpac-otam/administering-to-students/computer-based-test-session/2026-5b-image027.jpg) ] icon in the Action column. In the window that appears, enter a brief reason for denying the request and select the [Deny] button. Entering a reason for denial is optional. Do not proceed to step 3.
] icon in the Action column. In the window that appears, enter a brief reason for denying the request and select the [Deny] button. Entering a reason for denial is optional. Do not proceed to step 3.
- To approve the request, select the [Approve] check mark [
- A printer dialog box opens with a cover page and the items that were selected to print.
- Select [Print] to print the requested test elements.
Viewing Approved Requests
To view approved requests:
-
Select Print Requests from the Menu drop-down list (figure 14). The Approved Requests window opens (figure 15), listing print requests by the student.
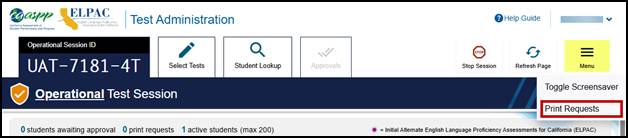
Figure 14. Print Requests option on Test Administrator Interface
-
The Print Requests window opens, listing print requests by the student. To print the list of approved requests, select the [Print] button (figure 15).
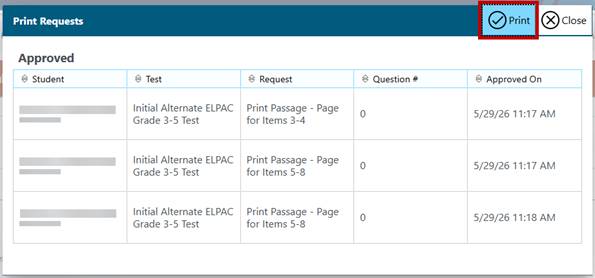
Figure 15. Print Requests window
Making a Record of Test Session Information
The TE can either print a snapshot of the Test Administrator Site as it currently appears if a hard-copy record of the session ID or list of approved students is wanted; or download a spreadsheet with this information after stopping the session. A TE can address any concerns or questions about testing statuses with their site ELPAC coordinator.
Take these steps to print a snapshot of the screen during or after testing:
- In the banner at the top of the Test Administrator Interface, select the [Print Session] printer [
 ] icon. The device’s print dialog window appears.
 - Select the required print settings and then select the approval button ([Print] or [OK], depending on the web browser).
When the TA or TE selects the [Stop Session] button, an option to download a spreadsheet of the final test session details becomes available. Details in the spreadsheet are as follows for each student in the test session:
- Name
- SSIDs
- Test name
- Progress in the assessment
- Testing status
- Test settings status (default or custom)
- Status of students listed in the Tests with potential issues table and false for students listed in the Tests without issue table (Statuses can include whether the student timed out of the assessment or if the student has an outstanding print-on-demand request.)
Take these steps to export the details of the stopped session to a spreadsheet:
-
Select the [Export] button above the Tests table (indicated in figure 16)—there is a button for the Tests without issues table and for the Tests with potential issues table.
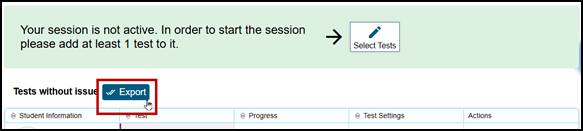
Figure 16. [Export] button in the Test Administrator Interface
- Retrieve the file from the Download folder or other default downloading location.
Ending a Test Session
After completing the assessment, select the [Next] button to proceed to the End Test review screen and then select [Submit Test] on the Submit Test screen to submit the assessment (figure 17).
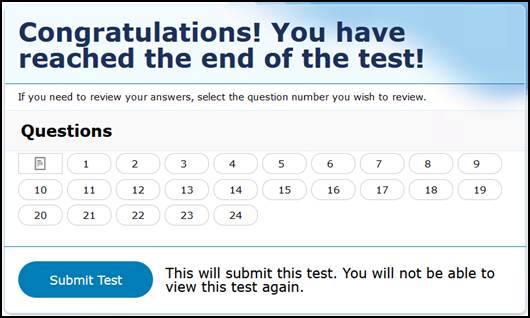
Figure 17. Submit Test screen
After the TE submits the assessment, the Test Summary screen appears, displaying the student’s name, the test name, and the completion date (figure 18).
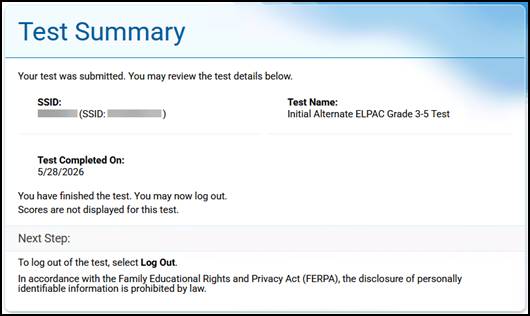
Figure 18. Test Summary screen
The TE should select the [Stop Session] button (indicated in figure 19) to end the test session.

Figure 19. [Stop Session] button on the Test Administrator Interface
When selected, the Important! message box appears (figure 20).
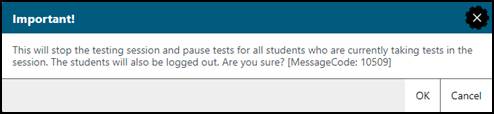
Figure 20. Important! message box
When finished, the TE can log off the Test Administrator Interface by selecting the [Name] drop-down list at the top right and then selecting Logout. The TE should also collect any picture cards, scratch paper, and other secure materials and follow procedures for local secure destruction as outlined in the Handling Secure Printed Materials section.
Back to Dashboard
To close the test session and return to the Test Administration Dashboard, select the [Name] drop-down list in the top-right corner of the screen, and then select Back to Dashboard (figure 21).
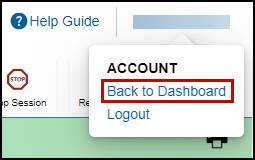
Figure 21. Back to Dashboard option under the [Name] drop-down list
Logging Off
Use caution when logging off the Test Administrator Interface, as this will log off other related systems (for example, TOMS). To log off the Test Administrator Interface, select the [Name] drop-down list in the top-right corner of the screen, and then select Logout (figure 22).
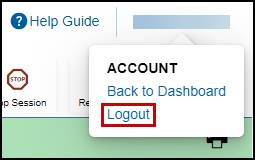
Figure 22. Logout option under the [Name] drop-down list
The session will close, and the TE will be directed to the CAASPP & ELPAC Website after the TE logs off.
After Test Administration
Destroying Test Materials
As a reminder, the printed and paper test materials identified in the Test Security chapter must be securely destroyed immediately following each test session and may not be retained from one test session to the next.
Reporting Testing Improprieties, Irregularities, and Breaches
Throughout testing, ensure that all test security incidents are reported in accordance with the guidelines in the Test Security chapter in this manual (that is, LEA ELPAC coordinators or site ELPAC coordinators must follow the ELPAC STAIRS/Appeals process in TOMS; refer to the Security Incidents and Appeals Procedure Guide for details about this process).