Remote Testing Features
Features by Role
There are remote testing features available in the secure browser and the web-based Student Testing Interface for the summative assessments, interim assessments, and practice and training tests. The remote testing features in table 1 are available by SSO role.
| Icon | Feature | Initiated By (SSO Role) |
|---|---|---|
|
|
Advanced scheduling of test sessions |
|
|
|
Video monitoring |
|
|
|
Individual messaging |
|
|
|
Raise hand |
|
|
|
One-on-one video call |
|
|
|
Broadcast |
|
|
|
Screen share |
|


Test Administrators
Advanced Scheduling
Remote test sessions can be scheduled only after the testing window has opened. Sessions can be scheduled for any date within two weeks from the current date. Refer to the Scheduling a Test Session subsection for the steps to take to schedule a remote test in advance.
Test Administrator Webcam and Microphone
When starting a remote test session, a pop-up box prompts agreement to allow the testing system to access the device’s webcam and microphone. Check the I agree checkbox and select the [Allow] button (figure 1). During the test session, you—as TA—have the ability to toggle the device’s webcam and microphone on and off.
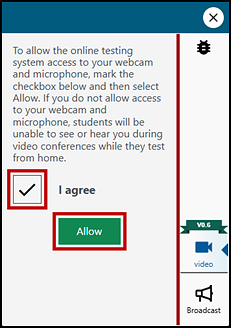
Figure 1. Permission box for remote tools
Monitoring a Test Session
Monitor students’ progress as they are testing from the Operational Test Session screen in the Test Administrator Interface (figure 2).
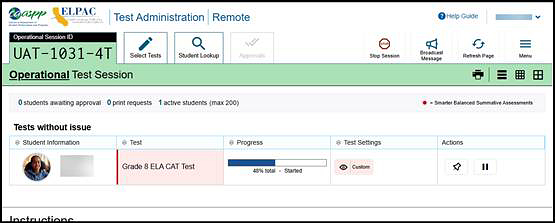
Figure 2. Operational Test Session screen with a student selected
There are several tools useful for monitoring students in the Test Administrator Interface:
- The Student Information column provides information about the students testing remotely. The video thumbnail icon next to the student’s name and SSID displays a snippet from the student’s video feed every five seconds. If the student’s camera is not on or is not working, the video thumbnail appears grayed out. If a student selects the [Raise Hand] icon in the communication widget, a [Chat] chat bubble icon appears next to the student’s video thumbnail.
- The test status indicates whether a student’s assessment is approved, started, completed, or paused.
- The blue progress bar shows the student’s progression through the assessment.
- When selected, the [View], or eye, icon opens the test settings for each student.
- If a student’s assessment requires attention, has been idle, is unexpectedly disconnected from a session, or has pending requests for print-on-demand, the Test Administrator Interface separates the assessment into a “Tests with Potential Issues” section.
Video Monitoring
The three icons in the top-right corner of the Operational Test Session screen allow toggling between student thumbnail layouts. These are shown in table 2.
| Icon | View Type |
|---|---|
|
|
List View |
|
|
Gallery View |
|
|
Grid View |


The List View (figure 3) is the default view when the TA first enters the Test Administrator Interface. As students complete their audio and video checks, they appear in the Test Administrator Interface test monitoring screen in this view with video monitoring thumbnails for each student. The video feed refreshes every five seconds.
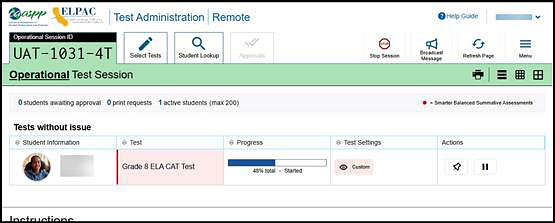
Figure 3. Operational Test Session screen in List View
If the student loses video or connectivity at any time, a “sad-cloud” [ ] icon displays instead of the student’s picture. If the assessment requires video, the student is not able to proceed with the assessment until the student’s video is reconnected. Select the thumbnail of the student to open the communication widget that allows direct communication with the student.
The Gallery View (figure 4) shows 10 students at a time; scroll to see additional students if there are more than 10 students in the administration.
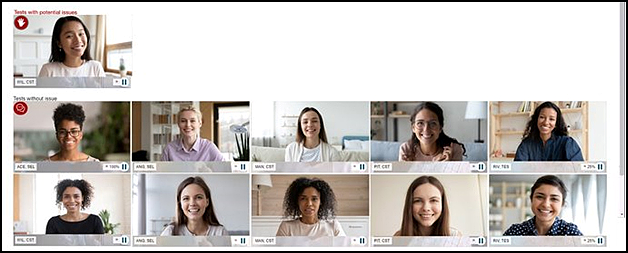
Figure 4. Operational Test Session screen in Gallery View
The Grid View looks like the Gallery View, except it displays four students at a time with larger pictures.
The following actions are possible from the Gallery View:
- Pause students’ assessments by selecting the [Pause] icon
- View the percentage of assessments that have been completed
- Identify students who need additional support (A red raised hand or chat bubble appears in this view if a student sends a message or raises a hand.)
Test Administrator Communication Widget
Once a test session has begun, there are several tools to communicate with the student. The communication icons function similarly across the three view types.
- Select a student’s thumbnail from the default list view to open the communication widget that allows direct communication with the student.
- Select the [Phone] icon to video call one-to-one with the student.
- Select the [Messages] icon to chat with one student or to send out a broadcast message to all students at once in the chat that is read to students automatically using text-to-speech.
- Select the [Video] icon to view the live student video again.
- If the student’s [Raise Hand] icon was activated, select the [Lower Hand] icon once the student’s question is resolved.
- Select the [Exit] icon—shaped like an “X”—to exit the communication widget.
One-to-One Video Call
Only you, as the TA, can initiate a one-to-one video call, not the student; select the [Phone] icon to make a call. Videos of both you and the student are present on a split screen during the video call (figure 5). The student can see and hear you, but only you have the ability to turn on and off the student’s video and microphone. To end the call, select the [Phone]  icon again.
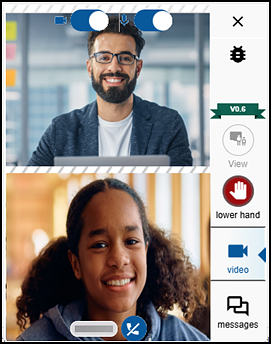
Figure 5. One-to-one video call with split screen
Broadcast Feature
Use the broadcast feature to communicate with all the students in the test session (figure 6). This is a one-way feature only the TA can initiate—students cannot communicate with other students during the test session.
When sending a broadcast text message, all students receive the message in the communication widget. The broadcast message displays differently to the student than the chat message does. The broadcast is seen as text in the student communication widget and is read aloud automatically to the students using text-to-speech.
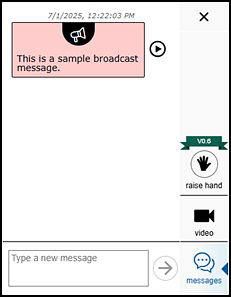
Figure 6. Broadcast message
For a demonstration of the TA communication widget features, watch the Monitoring a Remote Test Session video.
Screen Share View
Use the screen share feature to view a student’s screen during the test session (figure 7). This is a one-way feature only the TA can initiate by selecting the [screen share] icon.
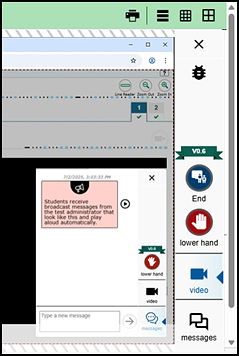
Figure 7. A screen share view
After selecting the [screen share] icon, the student needs to grant permission by selecting the [I agree] box and [Allow] button on the widget. Once the student grants permission, a red dotted line appears around the student’s screen indicating that the screen is being shared. The Test Administrator Interface has a window with a live feed of the student’s screen. The student can still interact with the assessment while sharing the student’s screen; use the chat widget and audio or video features to chat with the student. Select the [X] in the upper right corner of the window or select the [End Screen Share] icon in the widget to end sharing. The red line disappears once screen sharing stops.
Students
This section can be shared with parents/guardians and students prior to testing and is written with the student in mind. The Remote Testing for Students At-a-Glance is available as well.
Student Communication Widget
When you log on to the assessment, a widget with a small image of your live video appears in the corner of your screen (table 3). Select this widget for more tools to communicate with your teacher during the assessment.
| Icon | Description |
|---|---|
|
|
Select the [Raise Hand] icon on the sidebar of the widget to get your teacher’s attention. |
|
|
Select the [Messages] icon to switch from video view to chat view to send your teacher a message. |
|
|
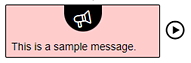
If your teacher sends a message to everyone at once, it plays aloud automatically. You can read the message in the chat or press the [Play] button next to it to listen to it again. |
|
|
If you need to step away from your computer or tablet, make sure you press the [Pause] button first at the top of your screen. |

Student Audio/Video Checks
Camera Check
To complete the camera check, you need to first select the box to agree to grant the web browser permission to access your camera by selecting the checkbox next to I agree to grant the browser permission to access the camera (figure 8). When your individual video appears, select the blue [I see myself] button.
If you select the [I cannot see myself] button, the system will help you solve the problem.
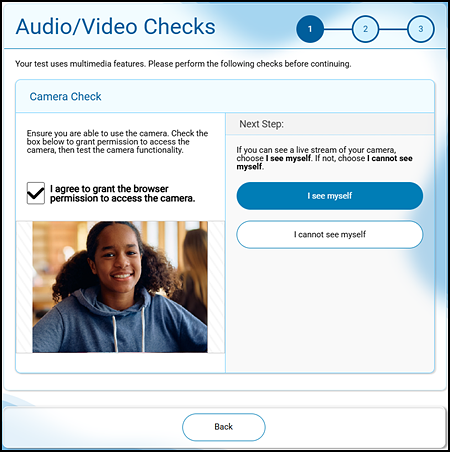
Figure 8. “Camera Check” section of the Audio/Video Checks screen
Recording Device Check
The check for a recording device is required for all students, in case you have to enter into a call with your teacher during a remote test session.
To complete the recording device check, select the [Recording] microphone [ ] icon button, record a brief statement, press the [Stop] square [
 ] icon button, and then replay the recording.
If you select the [I did not hear my recording] button (figure 9), the system will help you solve the problem.
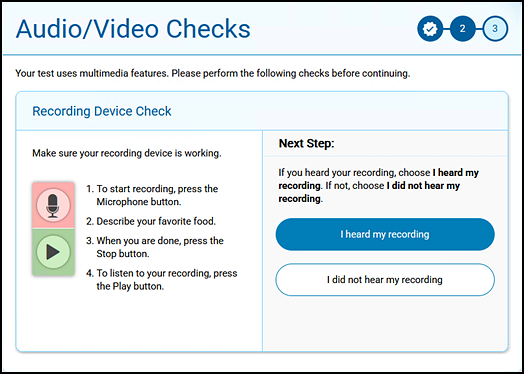
Figure 9. "Recording Device Check" section of the Audio/Video Checks screen
Sound and Video Playback Check
To complete the sound and video playback check, first select the [Play] button. If you can hear the music and see the moving musical notes, you can select the blue [I could play the sound and video] button (figure 10).
If you cannot hear the music and see the moving musical notes, select the [I could not play the sound or video] button and the system will help you solve the problem.
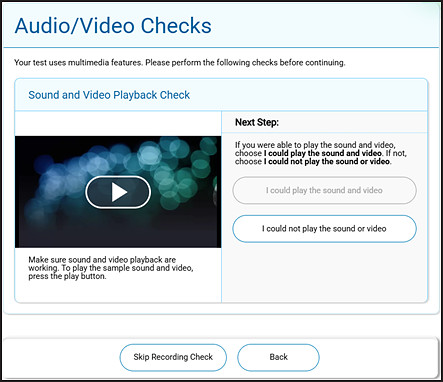
Figure 10. “Sound and Video Playback Check” section of the Audio/Video Checks screen
Text-to-Speech Sound Check
To complete the text-to-speech sound check, select the [Speaker] [ ] icon and, if you want to, change the voice pack and adjust the volume, pitch, or rate (figure 11). Then, indicate whether you have heard the voice, did not hear the voice, or want to skip the check. Finally, select [Continue].
If you select the [I did not hear the voice] button, the system will help you solve the problem.

Figure 11. “Text-to-Speech Sound Check” section of the Audio/Video Checks screen