Signing In to the Student Testing Site
This section describes the student sign-in process for the student testing application. A student follows this procedure when starting a new assessment or resuming a paused assessment.
If the student does not know what SSID and name to use (full name or preferred name) as it appears in TOMS, a TA or TE can retrieve it in the Test Administrator Site (refer to the subsection Looking Up Students).
Step 1: Signing a Student In
To sign a student in to a test session:
-
The student launches the secure browser on a testing device. The Student Sign-In screen appears. Text-to-speech is available during the sign-in workflow when a student selects the [Read Page] button (indicated in figure 1).
![Student Sign In screen with the [Read Page] button indicated.](/s/caaspp-otam/student-testing-application/sign-in-student-test-site/2025-8a-image002.png)
Figure 1. Student Sign In screen
-
The student selects the [Sign In] button. The Is This You? screen appears (shown in figure 2).

Figure 2. Is This You? screen
Step 2: Verifying Student Information
After a student signs in, the Is This You? screen appears (figure 3). The student verifies personal information on this page.

Figure 3. Is This You? screen
To verify personal information:
- If all the information is correct, the student selects [Yes]. The Your Tests screen appears (figure 5).
- If any of the information displayed is incorrect, the student must not proceed with testing. The student should select [No]. A TA or TE must notify the site CAASPP coordinator that the student’s information is incorrect.
Step 3: Entering the Session ID
When the Login Session screen appears (figure 4), the student enters the provided session ID in the Session ID field and then selects the [Join Session] button.
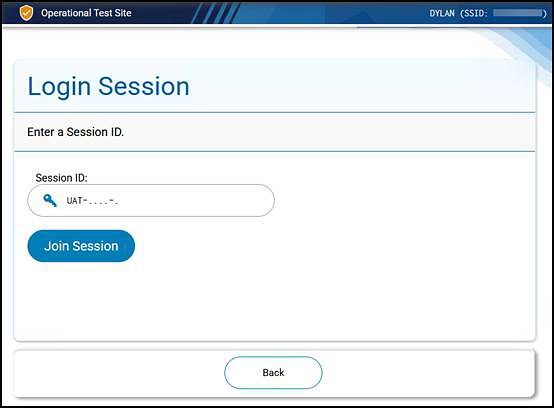
Figure 4. Login Session screen
Step 4: Selecting an Assessment
The Your Tests screen displays all the assessments a student is eligible to take (refer to figure 5). The student (or the TE for the CAA) can only select assessments that have been selected by the TA or TE and still need to be completed.
Assessments are shaded in a light color with an arrow icon pointing at the test name. When starting a new test opportunity, the arrow is solid. When resuming a test opportunity, the arrow is a circle with the hands of a clock in it.
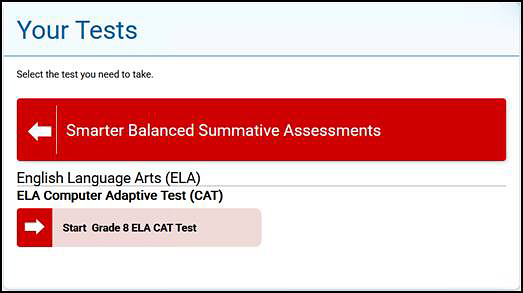
Figure 5. Your Tests screen (sample screen)
To select an available assessment:
-
The student or the TE (for a CAA) selects the required test name. The request is sent to the TA or TE for approval, and the Waiting for Approval screen appears (figure 6).
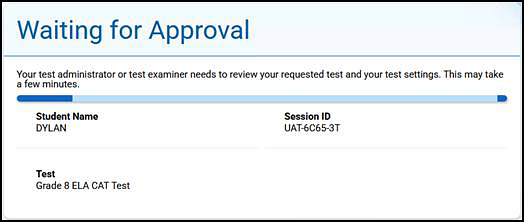
Figure 6. Waiting for Approval screen (sample screen)
- If a student’s required assessment is not displayed, the student should select [Return to Login]. Verify the test session includes the correct assessments and add additional assessments, if necessary.
Step 5: Verifying Test Information
After the TA or TE approves the student for testing, the student (or the TE, for a CAA) should verify the test information and settings on the Review Test Settings screen figure 7).
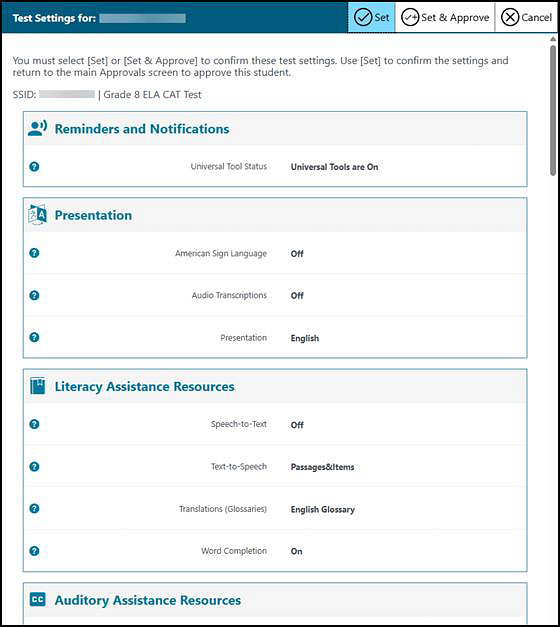
Figure 7. Review Test Settings screen (sample screen)
To verify test information:
- If the settings are correct, the student (or the TE, for a CAA) selects [OK].
- If the settings are incorrect, the student (or the TE, for a CAA) selects [Request Changes]; this action will exit the student from the test session. The TA or TE must report the incorrect test settings to the site CAASPP coordinator, who will update them as required in TOMS and reschedule the student’s testing. After a student’s test settings are corrected, the student must sign in and request approval again.
Step 6: Sound and Video Check
Refer to the Troubleshooting Issues subsection for a list of actions that can be taken if the student experiences issues with any of these checks.
Audio/Video Check
The Audio/Video Checks screen appears for the Smarter Balanced, CAST, CAAs for ELA and mathematics, and the CSA (refer to figure 8)—the CAA for Science has a video check only. A student verifies seeing the sample video and hearing the sample audio in the “Sound and Video Playback Check” section. The screen is in Spanish for the CSA.
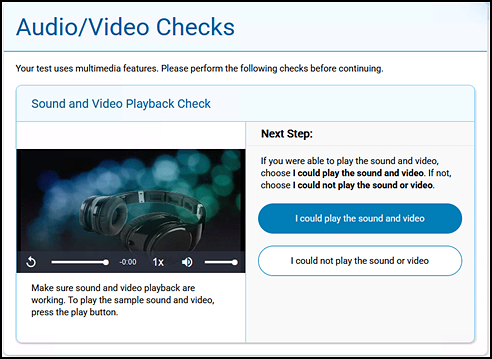
Figure 8. “Sound and Video Playback Check” section of the Audio/Video Checks screen
To check audio and video settings:
- The student plays the video and listens to the audio by selecting the [Play] arrow [
 ] icon.
 - Depending on the sound and video quality, the student does one of the following:
- If the student can hear the sound and view the video, the student selects [I could play the sound and video]. A green check appears at the upper-right corner of the panel and the Instructions and Help screen appears.
- If the student cannot hear the sound and view the video, the student selects [I could not play the sound or video]. The Audio/Video Playback Problem panel appears, giving the student two options:
- The student can select [Try Again] to return to the Sound and Video Playback Check page.
- The student can select [Log Out]. The TA or TE should troubleshoot the device and headphones or move the student to another device with working audio and video.
Text-to-Speech Check
The “Text-to-Speech Sound Check” section of the Audio/Video Checks screen (figure 9), which appears if a student has the text-to-speech designated support assigned. On this section of the screen, the student verifies that text-to-speech is working properly on the student’s device. A student can only use text-to-speech within a supported secure browser.
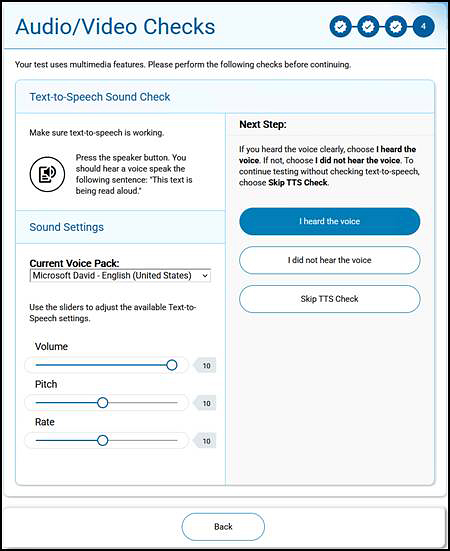
Figure 9. “Text-to-Speech Sound Check” section of the Audio/Video Checks screen
To check text-to-speech functionality:
- A student selects the [TTS Speaker] speaker [
 ] icon and listens to the audio.
 - If the voice is clearly audible, the student selects [I heard the voice]. A green check appears at the upper-right corner of the panel and the student can proceed.
- If the voice is not clearly audible, the student adjusts the settings using the sliders and selects the [TTS Speaker] icon again.
- If the student still cannot hear the voice clearly, the student selects [I did not hear the voice] and closes the secure browser. A TA can work with the student to adjust audio or headset settings (for more information, refer to the subsection Troubleshooting Issues). The student can sign in again when the issue is resolved.
- To continue without testing text-to-speech, the student selects [Skip TTS Check].
Recording Device Check
The “Recording Device Check” section of the Audio/Video Checks screen appears if a student has the speech-to-text setting (figure 10) or if the student is taking the speaking domain of the CSA (where the screen is in Spanish). On this screen, the student’s voice is recorded and the student verifies that the recorded audio is heard. Note that a student can only use the speech-to-text resource when logged on with an SSID into an active session.
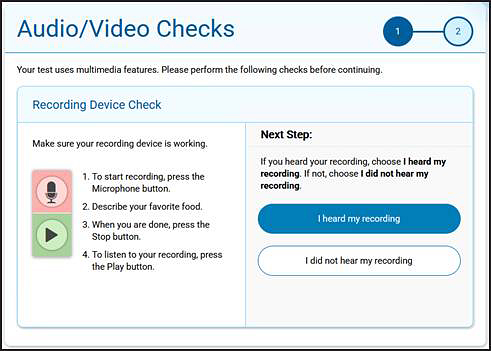
Figure 10. “Recording Device Check” section of the Audio/Video Checks screen
The student should log off if the recording device does not work. The TA or TE should troubleshoot the recording device or set up a different one.
To check speech-to-text functionality:
- The student selects the [Recording] microphone [
 ] icon and speaks to record.
 - The student selects the [Stop] square [
 ] icon to stop recording.
 - The student selects the [Play] arrow [
 ] icon to listen to the recorded audio.
 - If the recorded audio is clearly audible, the student selects [I heard my recording]. A green check appears at the upper-right corner of the panel and the student can proceed.
- If the recorded audio is not clearly audible, the student selects [I did not hear my recording] to open the Problem Recording Audio panel.
- If the student still cannot hear the recorded audio clearly, the student can select [Try Again] to return to “Recording Device Check” and retry.
- The student can select [Select New Recording Device]—which only appears for students testing on computers or tablets with multiple recording devices—to open the Recording Input Device Selection panel and select a different recording device.
Step 7: Viewing Test Instructions and Starting the Assessment
The Instructions and Help page is the last step of the sign-in process (refer to figure 11). A student may review this screen to understand how to navigate the assessment and how to use test tools.
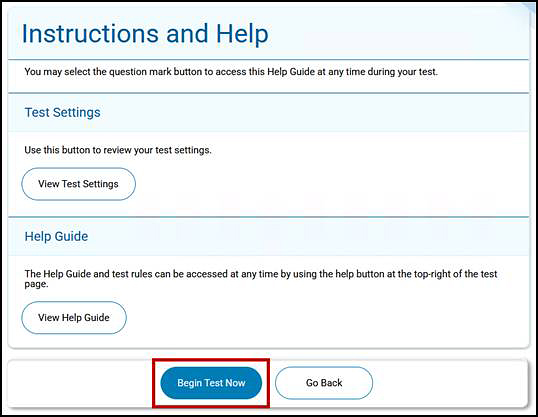
Figure 11. Instructions and Help page
To proceed and begin the assessment:
- After reviewing this page, the student selects [Begin Test Now] (indicated in figure 11). The test opportunity officially begins or resumes.
Common Student Sign-In Errors
The TDS generates an error message if a student cannot sign in. Table 1 lists the most common student sign-in issues, with possible resolutions:
| Message | Cause | Solution(s) |
|---|---|---|
|
This session is not available for testing |
The student entered the session ID incorrectly or signed in to the wrong site. |
Verify that the student correctly entered the active session ID. Also, verify that both the TA or TE and the student are using the correct sites. For example, students signed in to the Student Training Site cannot access sessions created in the Test Administrator Interface. As shown in figure 1, a message displayed in the bottom-left corner of the Student Sign-In page indicates which site the student is on, the practice and training site or the operational site. If a student is on the wrong site, the student can select the button included in the message to proceed to the correct site. |
|
No match |
Student name was not entered correctly. |
Verify that the student has entered the student’s name exactly as it appears in the Student Lookup tool. Spaces or accented characters must also be included; special characters in names may be added by typing the Unicode character (for example, by pressing the [Alt] + keypad [0201] to create the “É” in “JOSÉ” on Windows devices). |
|
No match for student ID |
SSID was not entered correctly. |
Verify that the student used a correct SSID. Use the Student Lookup tool to verify the student’s information. Refer to the subsection Looking Up Students for additional information. |
|
Session has expired |
The session ID corresponds to a closed session. |
Ensure that the student enters the correct session ID and verify that the session is open. For more information about test sessions, refer to the Administering a Computer-Based Test Session section. |
|
You must test in a session in your own school |
The student is not associated with the school, or the TA or TE is not associated with the student’s school. |
A student must test at the school of enrollment. A TA must be assigned the CAASPP Test Administrator role for all schools whose students participate within a test session. |
|
No tests are available at this time |
The student does not have demographic information that would make the student eligible for an assessment entered into TOMS or the entered information has not yet reached the TDS, or the assessments the student is registered for are not included in the test session. |
Verify that the assessment for which the student is registered is included in the session. |
|
Unsupported Browser/OS Combination |
The online testing system cannot determine whether the student is taking the assessment through the correct secure browser. |
Ensure the latest version of the secure browser is installed and that the student launched the secure browser instead of a standard web browser. If the latest version of the secure browser is already running, then log the student off, restart the device, and try again. |
|
Unable to Establish a Connection with the Test Delivery System |
The secure browser cannot connect to the TDS. This is most likely to occur if there is a network-related problem. |
Check whether the network cable is plugged in (for wired connections) or whether the Wi-Fi connection is live (for wireless connections). Also check whether the secure browser must use specific proxy settings; if so, those settings must be part of the command that launches the secure browser. Finally, verify that a firewall allows access to the TDS. |
|
Test Environment Is Not Secure |
This message can occur when the secure browser detects a forbidden application running on the device (refer to the section Security of the Test Environment). |
If this message appears on an iPad, ensure that Assessment Mode is enabled. Refer to the Technical Specifications and Configuration Guide for Online Testing or contact the technology coordinator. |
Troubleshooting Issues
If, after attempting to troubleshoot, the student is still experiencing issues, contact the site CAASPP coordinator or school technology coordinator.
Student Access
If a student experiences an issue with the TDS or if accessibility resources are not functioning as intended, have them either pause the test and then immediately rejoin the test session; or join a new test session.
Audio
Prior to testing, ensure that audio is enabled on each device and that headphones or headsets are functioning correctly. If audio issues occur, take one of the following actions:
- Ensure headphones or headsets are securely plugged in to the correct jack or USB port.
- If the headphones or headsets have a volume control, ensure the volume is not muted.
- Ensure that the audio on the device is not muted (often via a control panel or settings window). This requires logging off the secure browser to check the device’s volume settings and then logging back on to the secure browser.
Video
If video issues occur, take one of the following actions:
- Make sure the student has selected the [I could play the sound and video] button before attempting to continue.
- Ask the student to exit the secure browser and then restart the test session.
- Reboot the student’s device.
Recording
If the issue is that the student cannot hear their recorded voice, take one of the following actions:
- Ensure headsets are securely plugged in to the correct jack or USB port.
- Position the student’s microphone closer to the student’s mouth.
- Ask the student to speak louder.
- Reboot the student’s device.