Nondelivery Dates
LEA coordinators can designate dates for which they do not want to receive deliveries of paper tests by designating them on the Nondelivery Dates screen. A date designated as a nondelivery date is displayed as a dark blue box with a white number.
To locate the Nondelivery Dates screen, select the [Orders] tab from the TOMS navigation bar as shown in figure 1.

Figure 1. Nondelivery dates and nonworking dates on the Nondelivery Dates screen
Select one of the following links for help in using the Nondelivery Dates screen:
- Quick Instructions—Select to view quick instructions for setting nondelivery dates.
- Detailed Instructions—Select to view detailed instructions, including screen captures, to view and set nondelivery dates.
Quick Instructions
Take the following steps to select nondelivery dates:
- Select the [Orders] navigation tab in the top navigation bar.
- Select the organization, and then select the [Continue] button.
- Select each date to be designated as a nondelivery or nonworking date. Selected dates will be displayed as dark blue boxes with a white number.
- After making changes to the selected nondelivery dates, take one of the following actions:
- Select the [Save] button to save changes.
- Select the [Cancel] button to return to the “Select Organization” section without saving the selected dates and do not continue to the next step.
- The Confirmation: Saved message is displayed (figure 5). To close the pop-up message, select the [Close] button.
- Select the [Back] button at the bottom of the Nondelivery Dates screen (figure 6) to return to the “Select Organization” section.
Detailed Instructions
Use the following detailed steps to view or edit nondelivery dates:
-
To locate the Nondelivery Dates screen, select the [Orders] tab from the TOMS navigation, as shown in figure 2.

Figure 2. [Orders] navigation tab
- Select the [Orders] navigation tab in the top navigation bar.
-
Verify that the correct LEA is displayed in the “Select Organization” section (figure 3), and then select the [Continue] button.
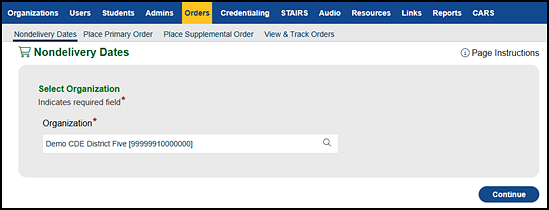
Figure 3. “Select Organization” section (School or LEA) of the Nondelivery Dates screen
-
The “Select Nondelivery Dates or Nonworking Dates” section displays the calendar for the test administration year (figure 4).
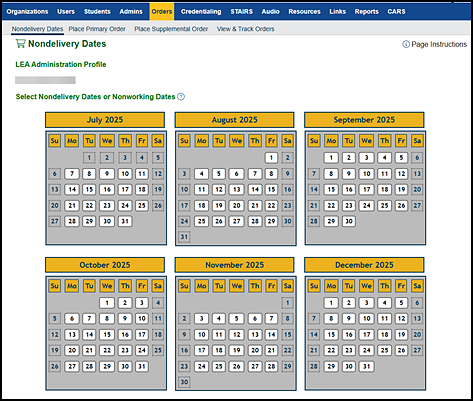
Figure 4. “Select Nondelivery Dates or Nonworking Dates” section of the Nondelivery Dates screen
- Select each date to be designated as a nondelivery or nonworking date. Selected dates will be displayed as dark blue boxes with a white number. To remove a nondelivery or nonworking date, simply select it again. After making changes to the selected nondelivery dates, do one of the following:
- Select the [Save] button to save changes for the selected dates.
- Select the [Cancel] button to return to the “Select Organization” section without saving the selected dates and do not continue to the next step.
-
The Confirmation: Saved message is displayed (figure 5). To close the pop-up message, select the [Close] button.
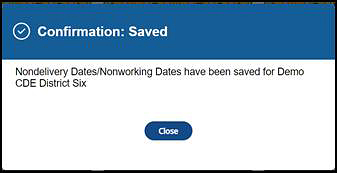
Figure 5. Confirmation: Saved message
-
Nondelivery dates are displayed as dark blue boxes with a white number (figure 6). Select the [Back] button at the bottom of the screen to return to the “Select Organization” section.
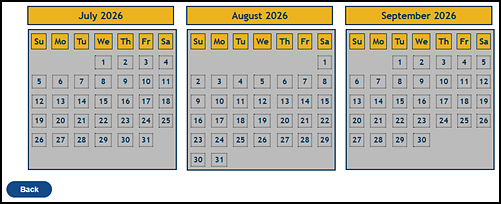
Figure 6. Bottom of the Nondelivery Dates screen