Summative ELPAC: Starting a One-on-One Remote Test Session
The California Department of Education would like to thank Delano Union Elementary School District for documenting this process that we used to create these instructions.
Kindergarten through Grade Two and Speaking Domain
- Begin by starting a video meeting with the student.
- Log on to the Test Administrator Interface from the ELPAC website to create a test session ID.
-
Start a new test session by selecting the [Start a New Session Now] button (indicated in figure 1).
![ELPAC Test Administrator Interface screen with Active Sessions tab and [Start a New Session Now] called out](/s/spring-21-educators/instructions-for-remote/summative-elpac/clip_image002.jpg)
Figure 1. [Start a New Session Now] button on the Test Administrator Interface
- Select a test or tests to add to the session.
-
Select the Remote or Hybrid radio button (indicated in figure 2).
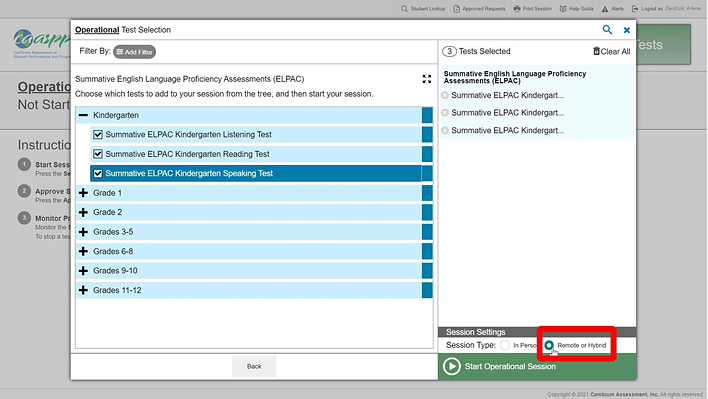
Figure 2. Remote or Hybrid radio button on the Test Selection screen
- Select the [Start Operational Session] button.
- Log on as the student in the web-based Student Testing Interface by taking the following steps:
- Copy the URL that appears in the Session Information pop‑up box; a sample URL is indicated in figure 3.
- Paste the URL into a new browser window to open the web-based Student Testing Interface.
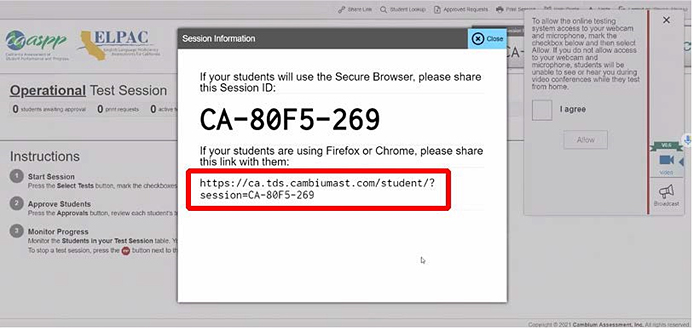
Figure 3. Session Information pop-up box with URL
- Sign in to the testing interface as the student.
-
Enter the student’s first name, the Statewide Student Identifier (SSID), and the session ID that was created in the Test Administrator Interface into the Student Sign-In screen (figure 4).
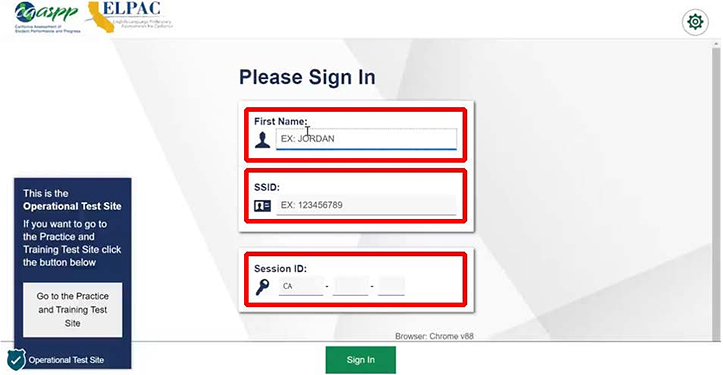
Figure 4. Student Sign-In screen
-
Select the test that the student will be taking on the Your Tests screen (figure 5).
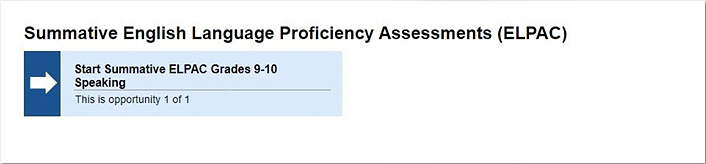
Figure 5. Test selection option on the Your Tests screen
-
Return to the Test Administrator Interface after the Waiting for Approval screen appears (figure 6).
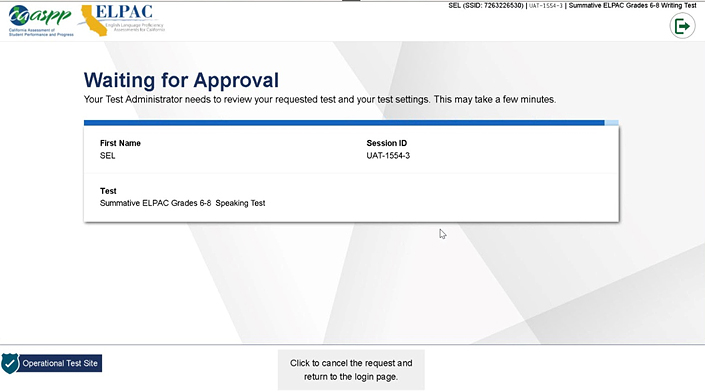
Figure 6. Waiting for Approval screen
-
Check the I agree box—indicated in figure 7—after returning to the Test Administrator Interface, to allow the testing system to access your device’s camera and microphone.
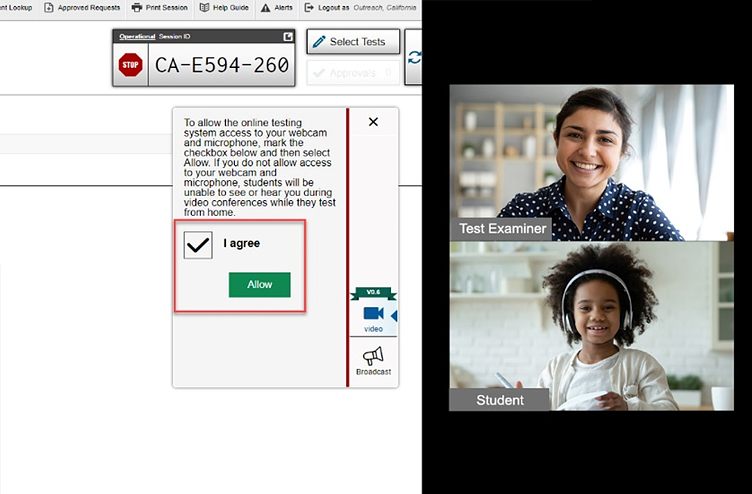
Figure 7. Default Operational Test Session screen with the I agree checkbox
- Turn the camera off in the video meeting so that the testing system can access it.
- Approve the student’s test.
-
Return to the student testing interface to complete the camera, audio, and sound checks. The camera check is shown in figure 8.
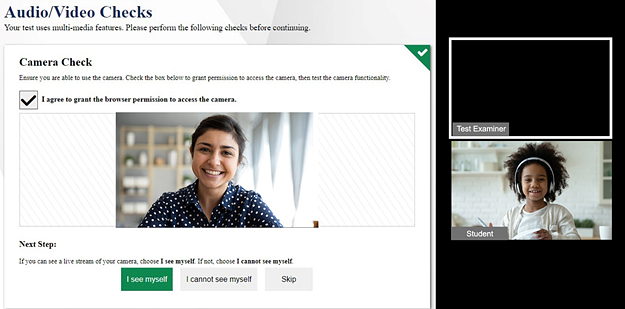
Figure 8. “Camera Check” section of the Audio/Video screen next to an open video meeting application
- Return to the student testing interface.
-
Turn off the camera using the camera toggle switch, which is indicated in figure 9.
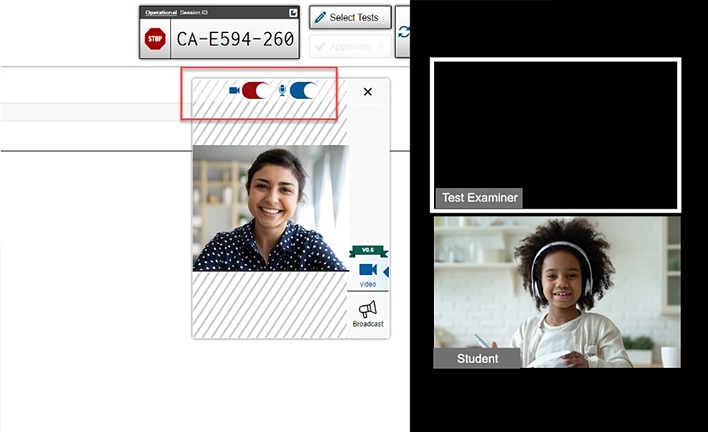
Figure 9. Camera toggle switch in the Operational Test Session screen
- Restart your camera in the video meeting.
- Select the [Camera allowed] video camera icon, which is located to the left of the URL in Firefox and to the right of the URL in Chrome.
-
Select the Always block camera access radio button in the pop-up box (indicated in figure 10). This allows the camera to be turned on in the video meeting so that the student can see the test examiner.
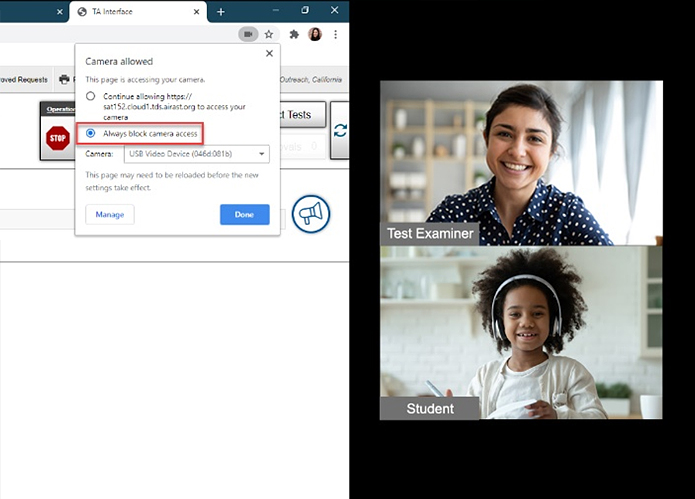
Figure 10. Cameras allowed pop-up box in the Operational Test Session screen
-
Start the ELPAC test session. Please note that the widget that appears in the lower-right corner of the screen (and that is indicated in figure 11) will remain empty throughout the test. This is because the camera is blocked in the testing system.
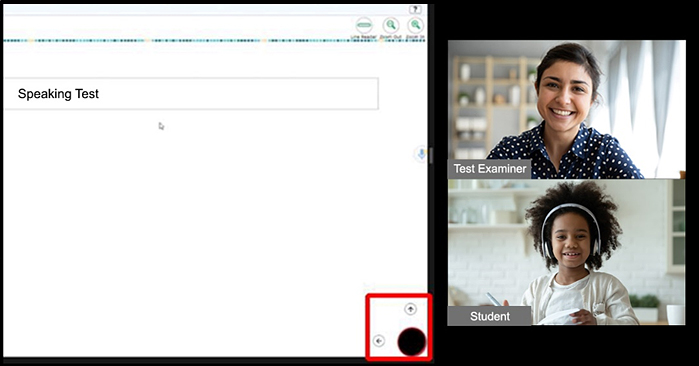
Figure 11. Sample test showing the camera widget